Skip to main content
Home
About Us
Meet Dr. Bottger
Financing Options
Blog
3D Imaging Technology
Online Reviews
Testimonials
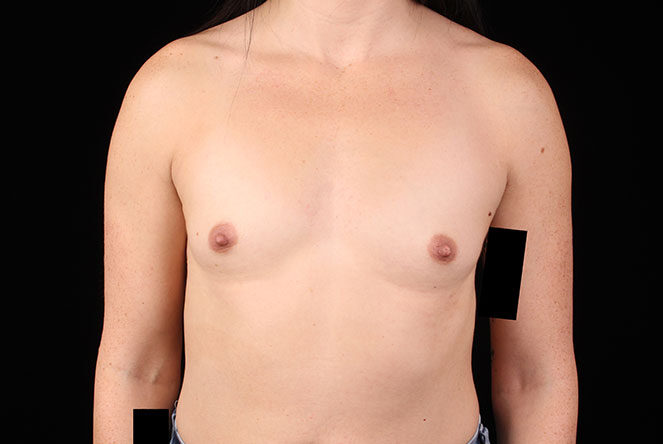
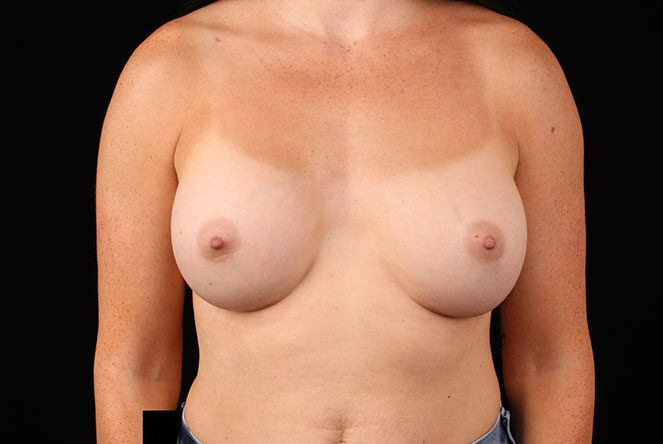
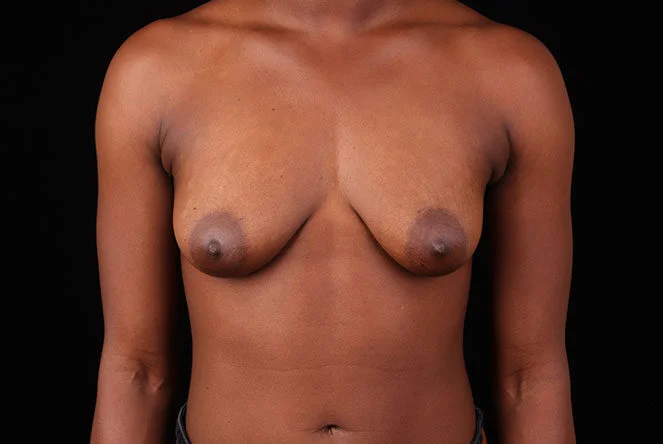
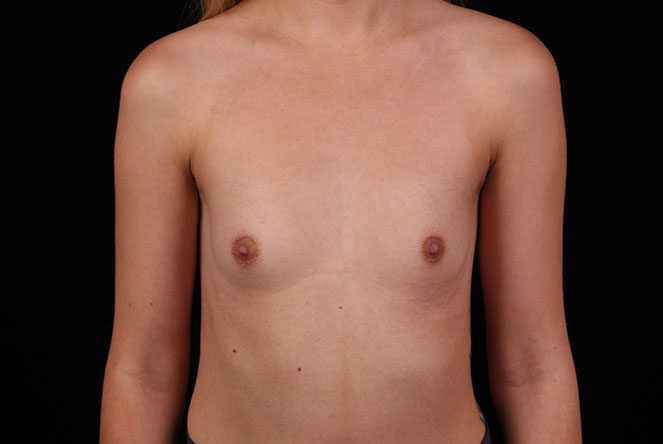
Breast Surgery
Breast Augmentation
Breast Augmentation Cost
Breast Lift
Breast Lift Cost
Breast Reduction
Breast Reduction Cost
Teenage Breast Reduction
Breast Implant Revision Surgery
Gynecomastia Surgery
Body Contouring
Liposuction
Liposuction Cost
Lipo 360
Tummy Tuck (Abdominoplasty)
Tummy Tuck Cost
Brazilian Butt Lift (BBL)
Arm Lift (Brachioplasty)
Arm Lift Costs
Thigh Lift
Thigh Lift Cost
Body Lift
Body Lift Cost
Mommy Makeover
Mommy Makeover Cost
Labiaplasty
Facial Procedures
Injectables
Facelift
Rhinoplasty
Blepharoplasty
Blepharoplasty Cost
Otoplasty
Lip Enhancement
Brow Lift
Neck Liposuction
Chin Implant
Earlobe Repair
Fat Transfer
Fat Transfer Breast Augmentation
Facial Fat Transfer
Gallery
Testimonials
Online Reviews
Blog
Contact Us
Directions
610-355-1929
David A. Bottger, MD
Home
/
Gallery
/
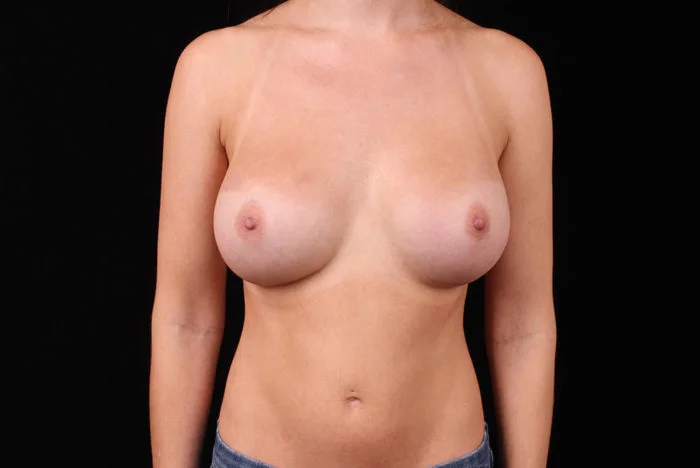
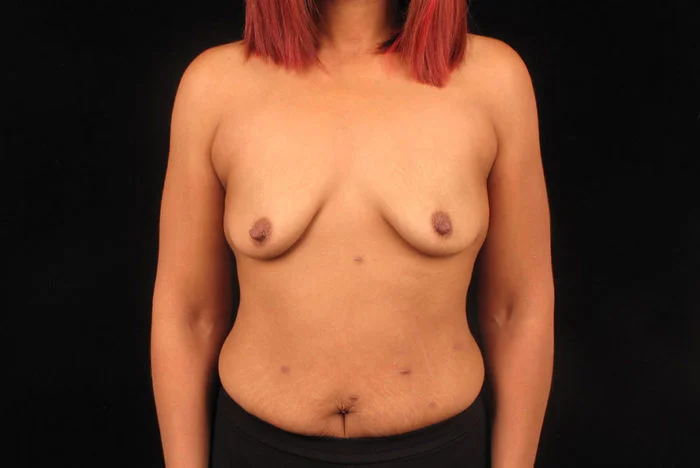
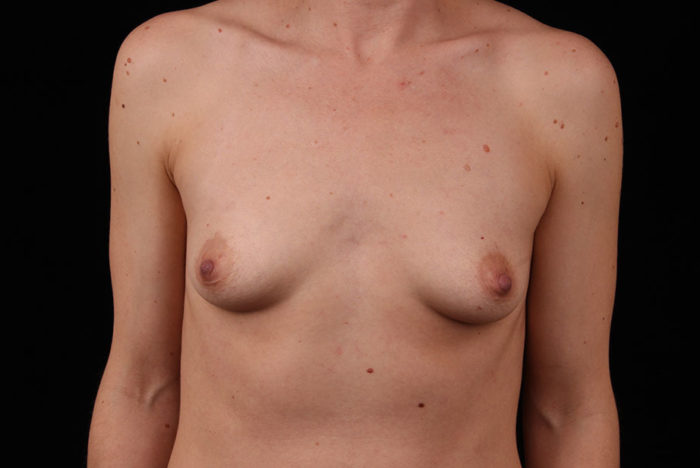
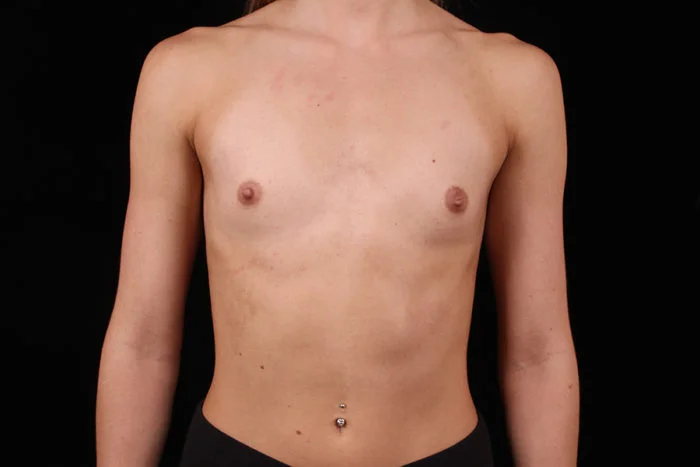
Breast Augmentation
Breast Augmentation Gallery
Gallery
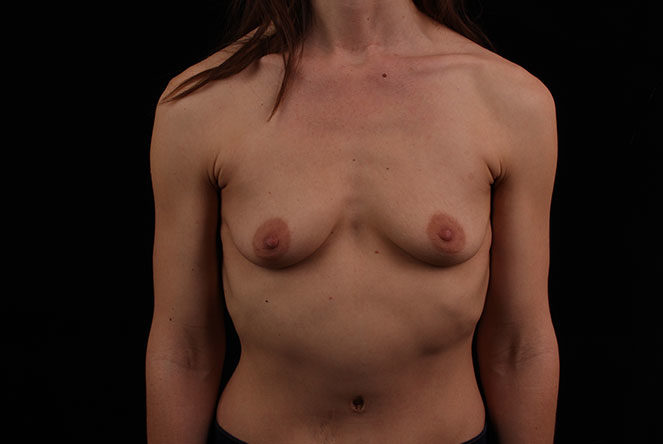
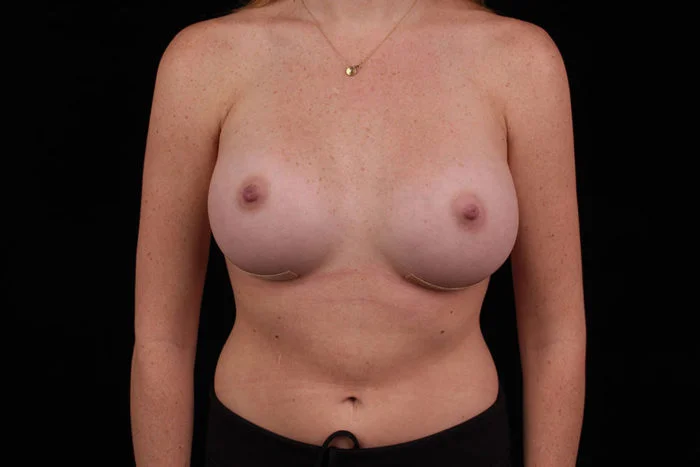
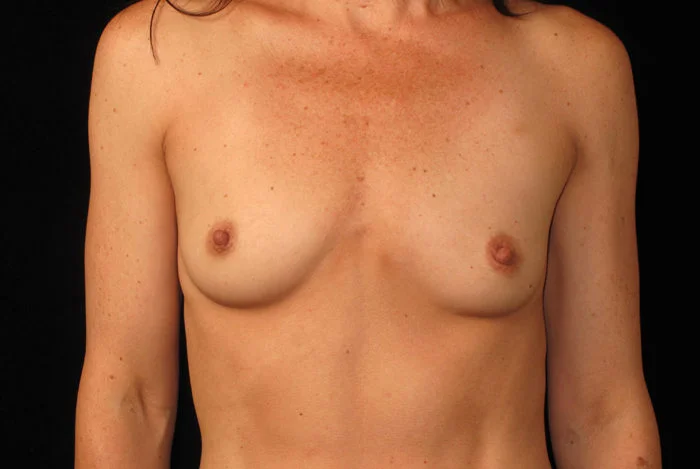
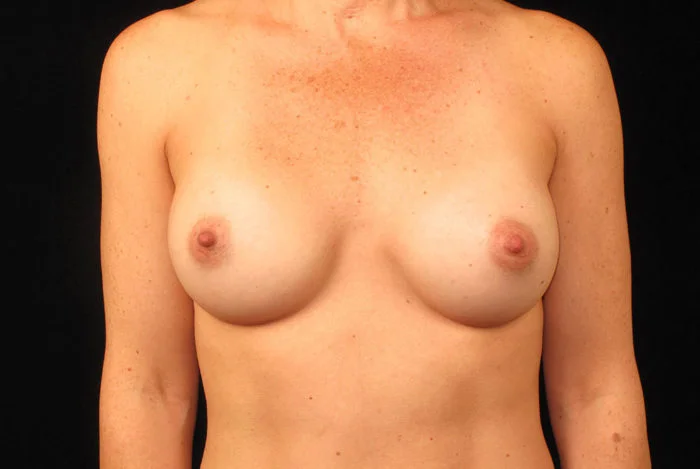
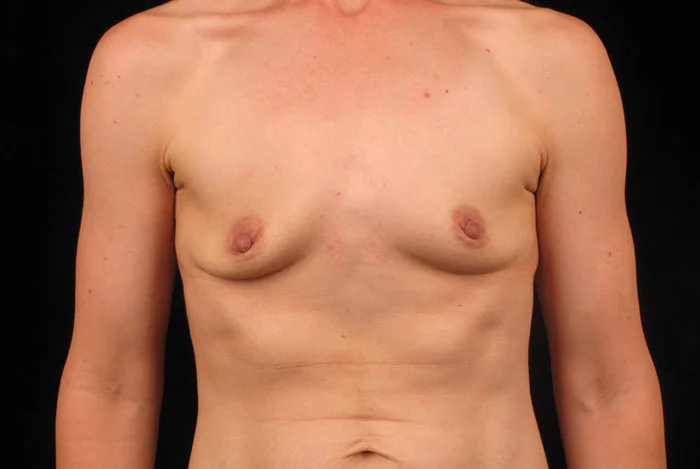
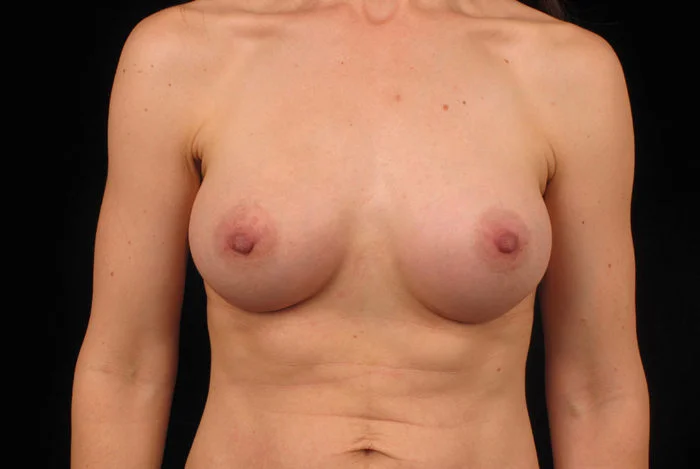
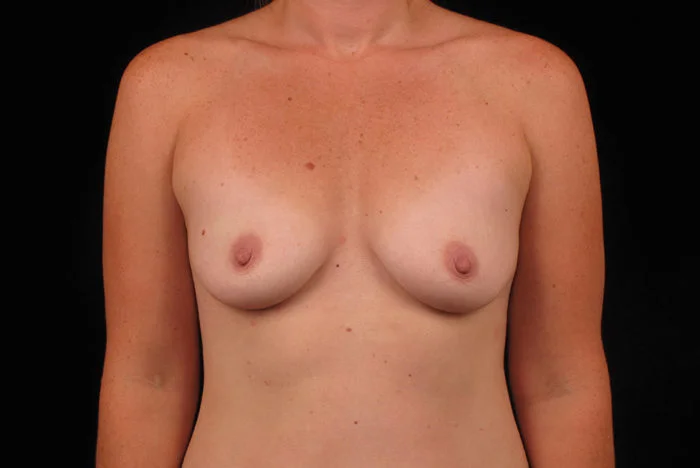
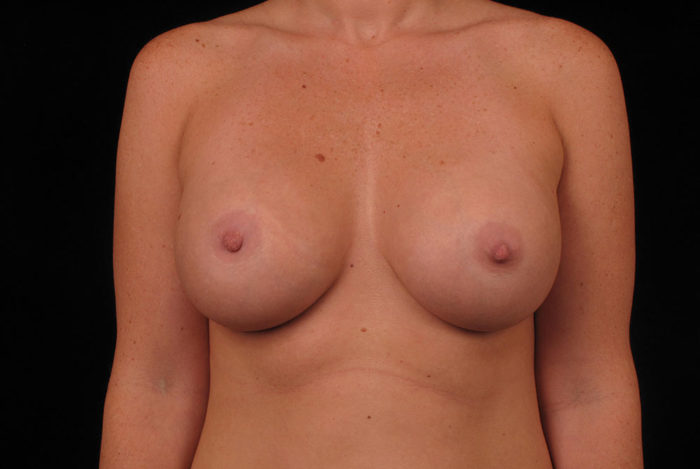
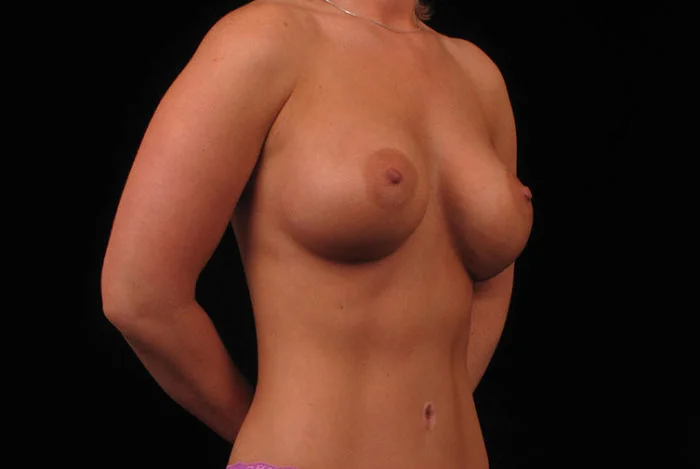
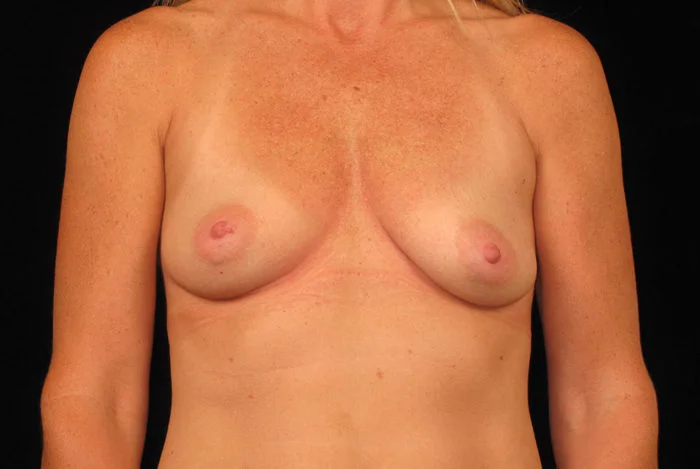
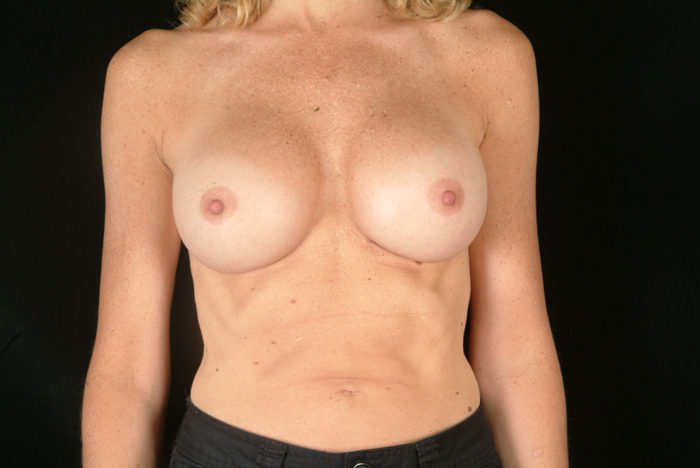
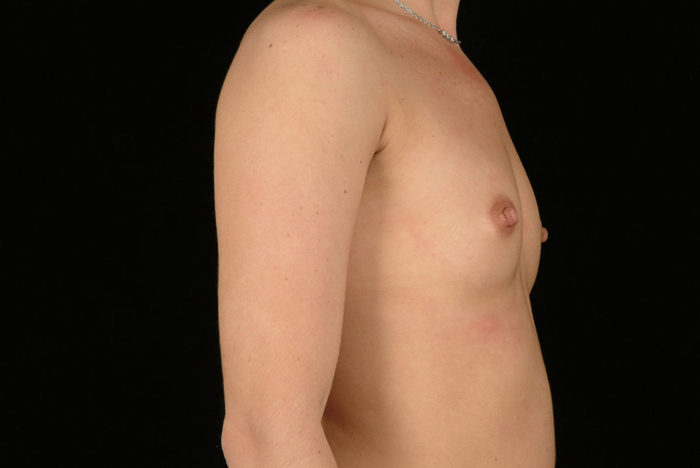
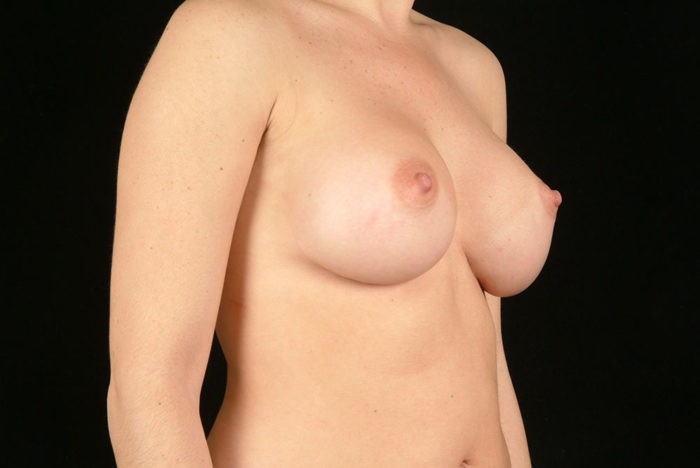
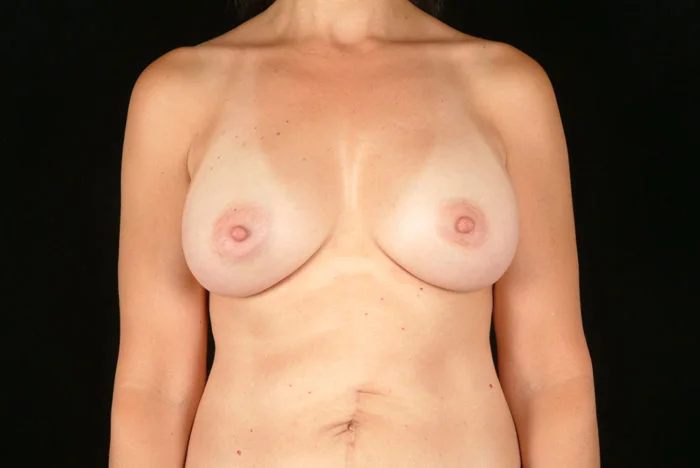
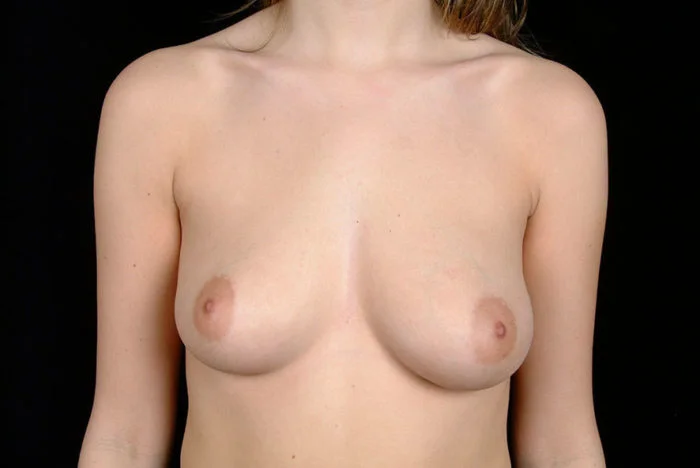
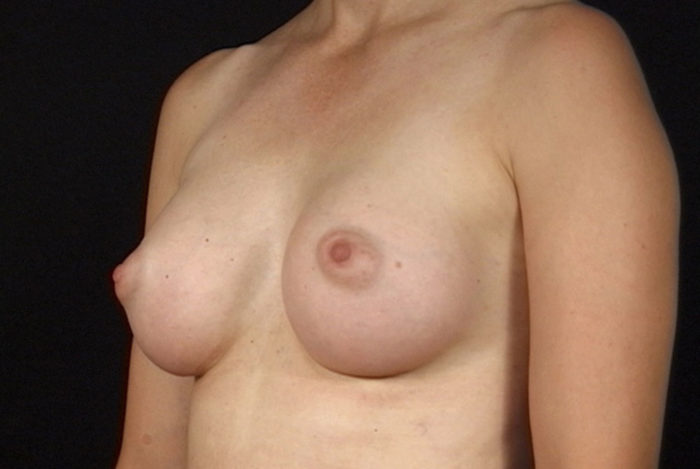
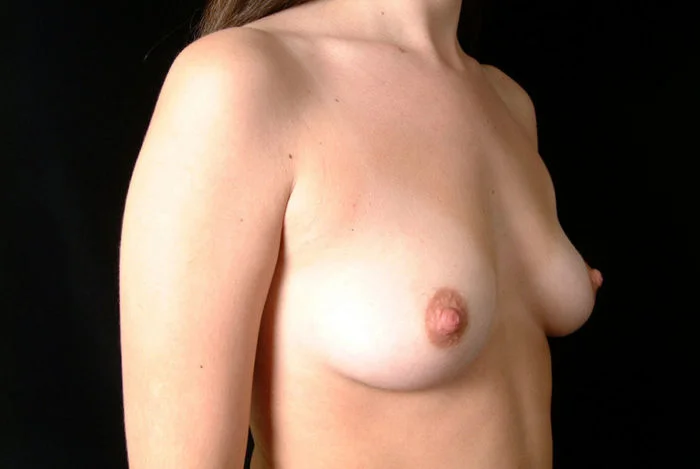
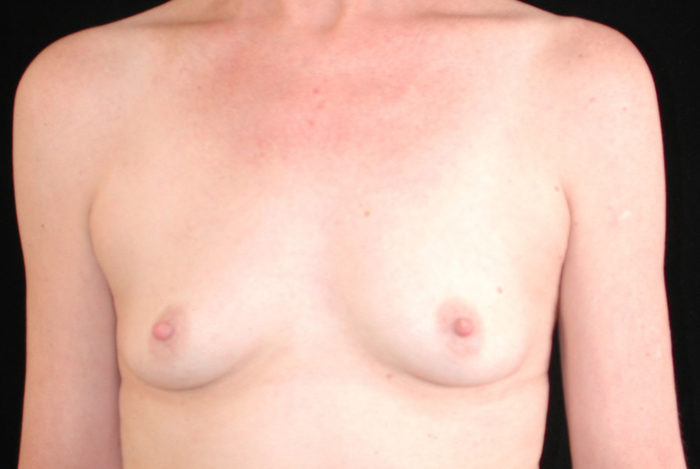
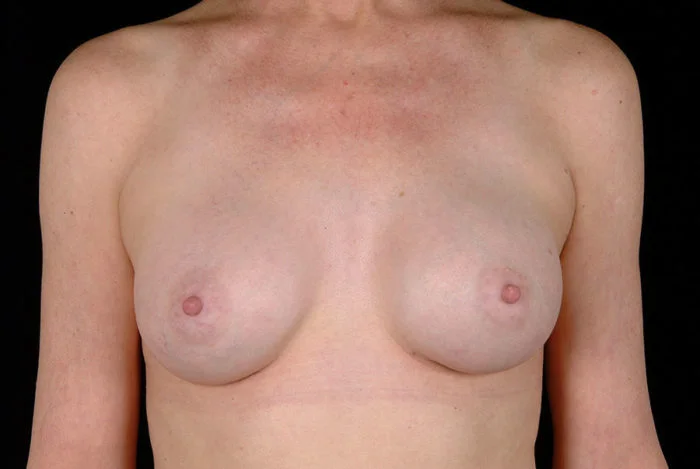
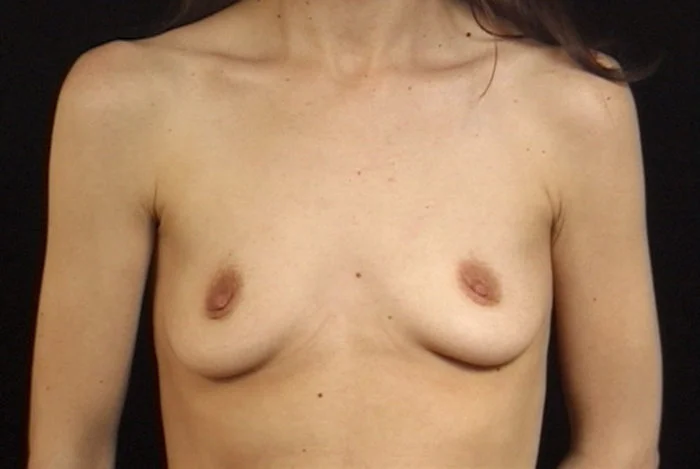
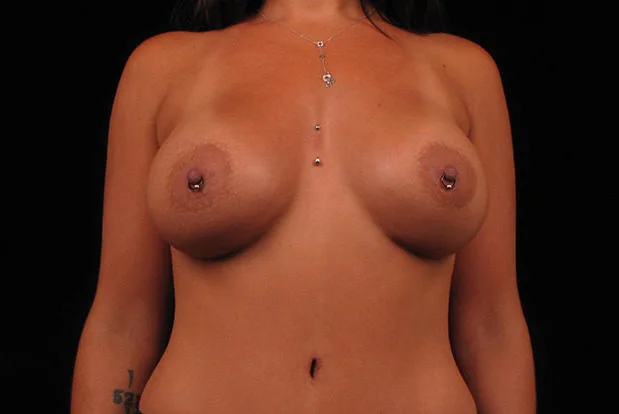
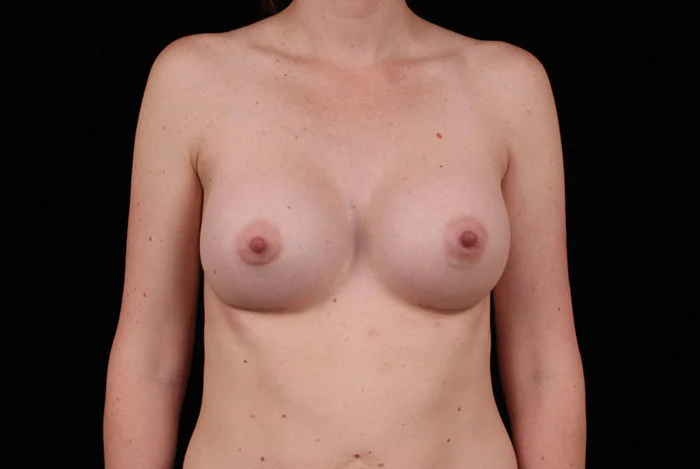
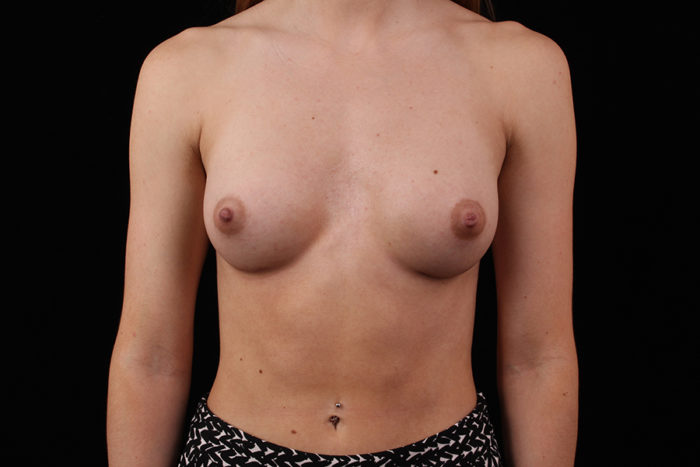
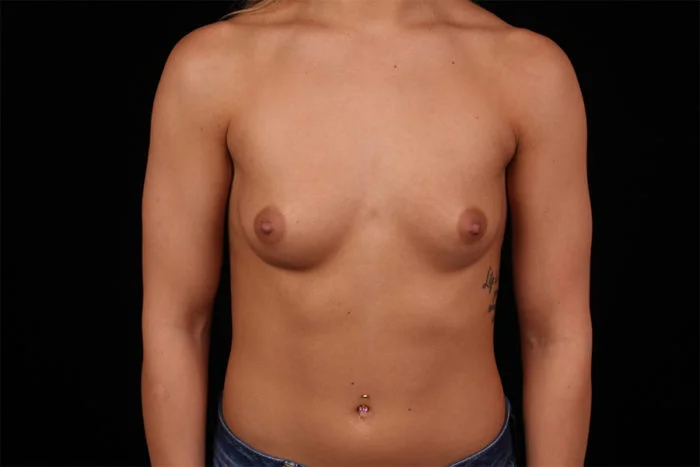
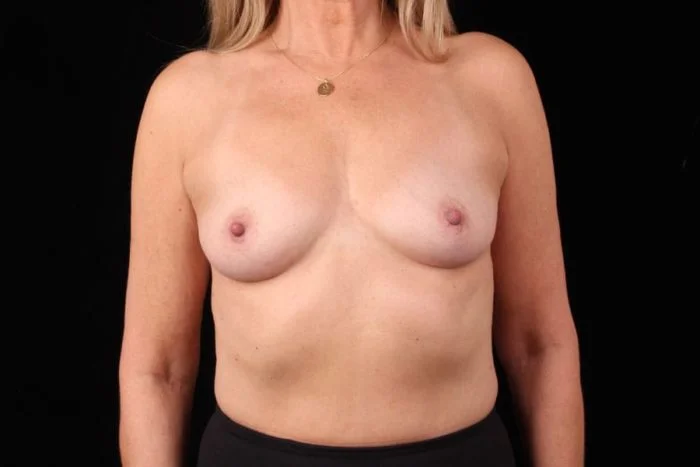
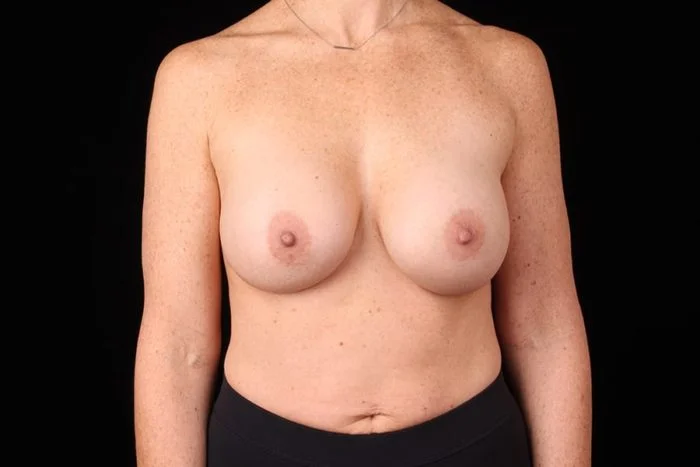
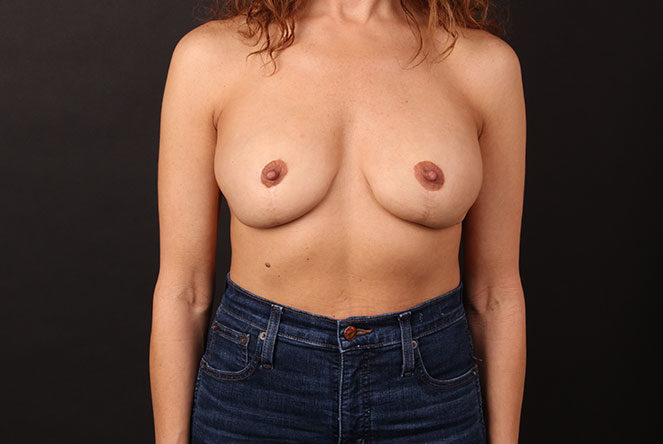
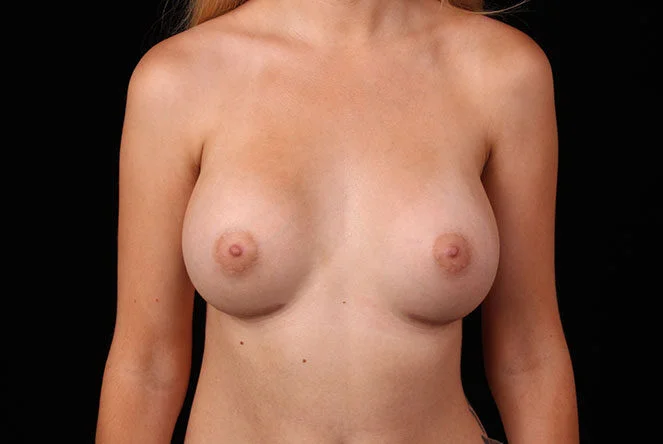
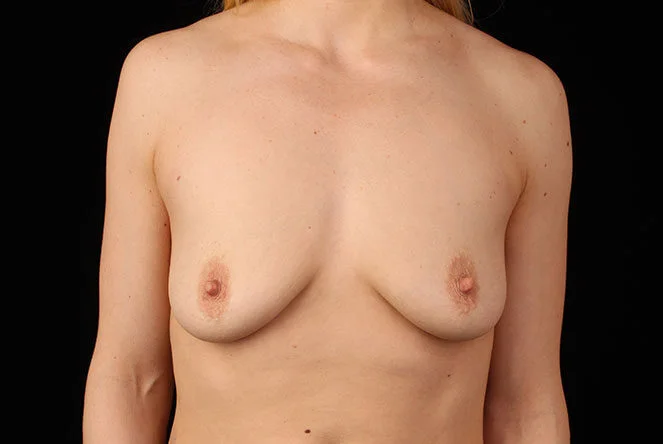
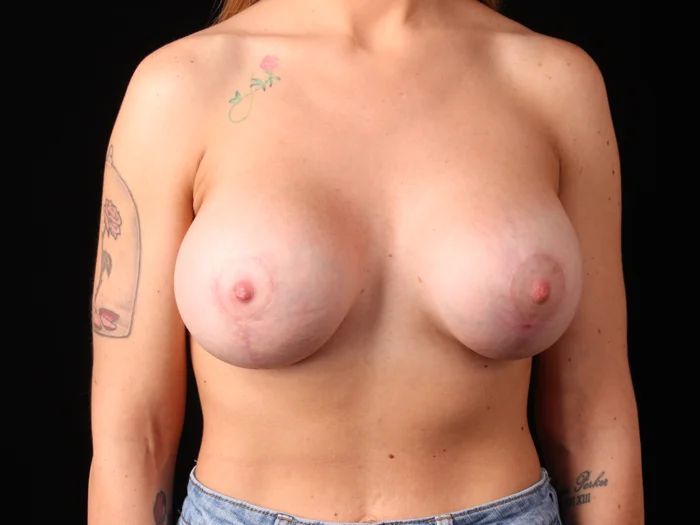
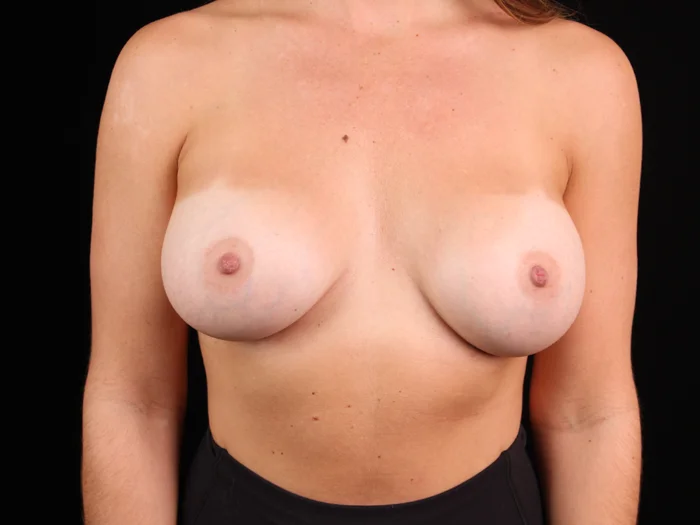
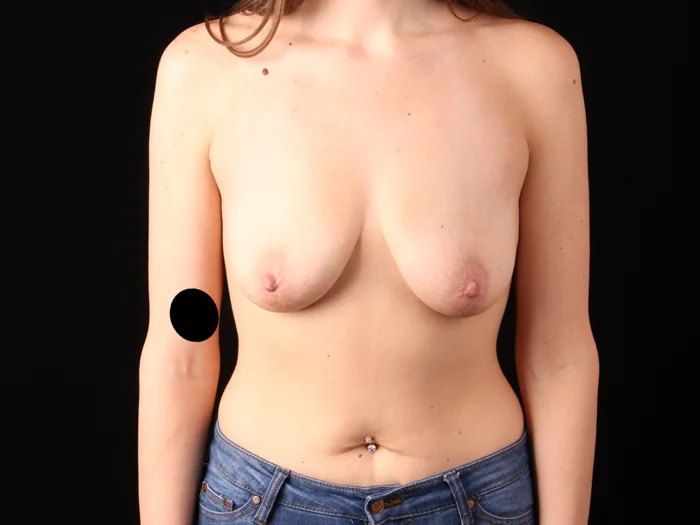
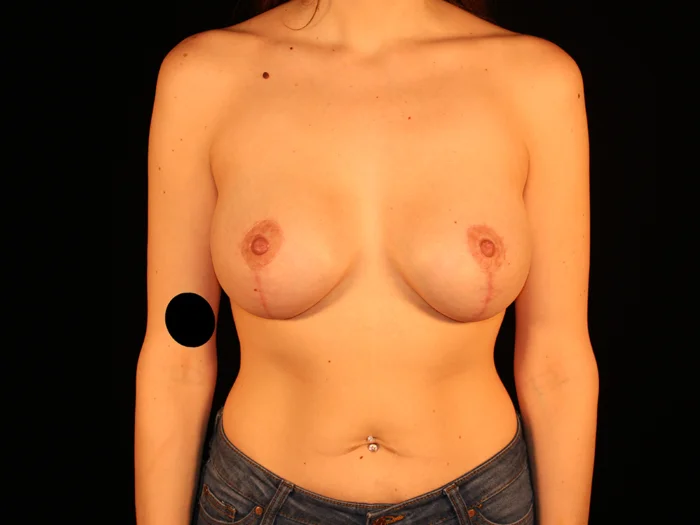
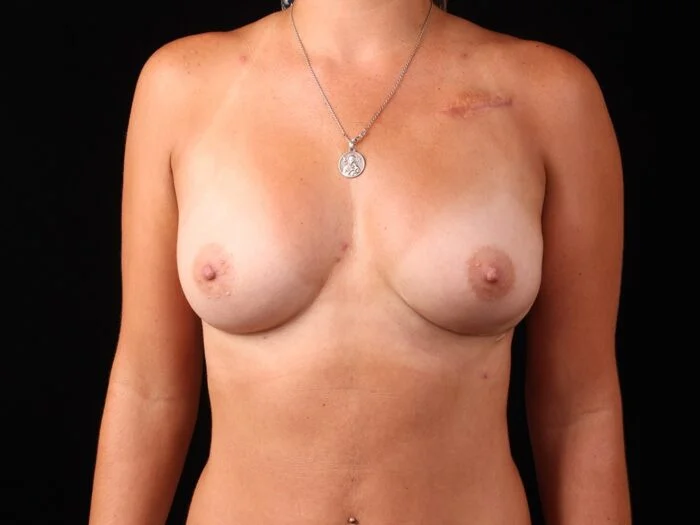
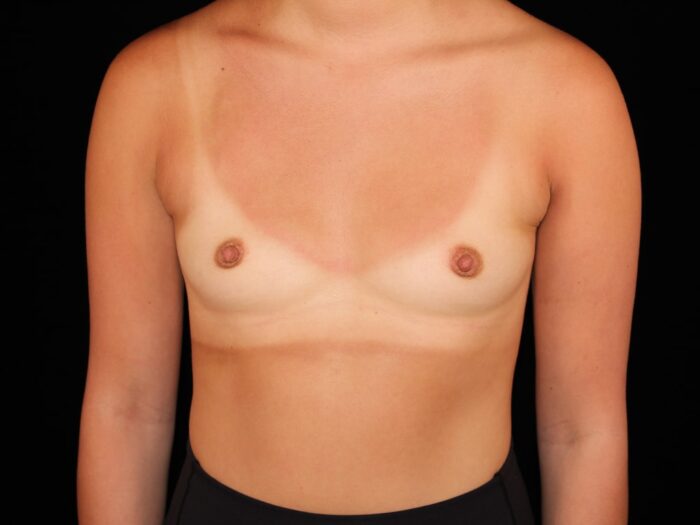
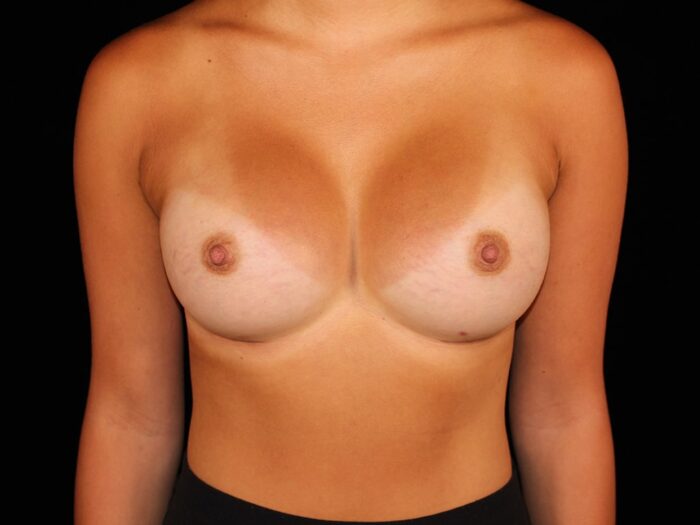
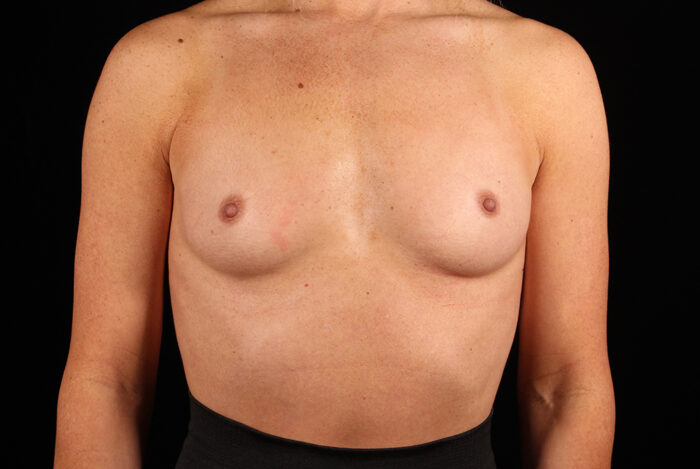
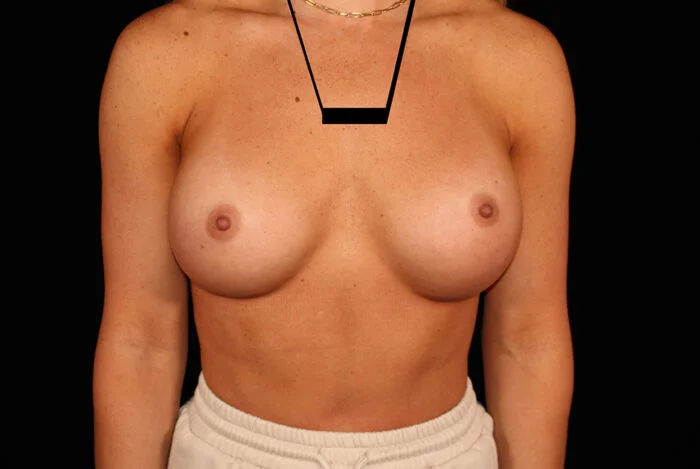
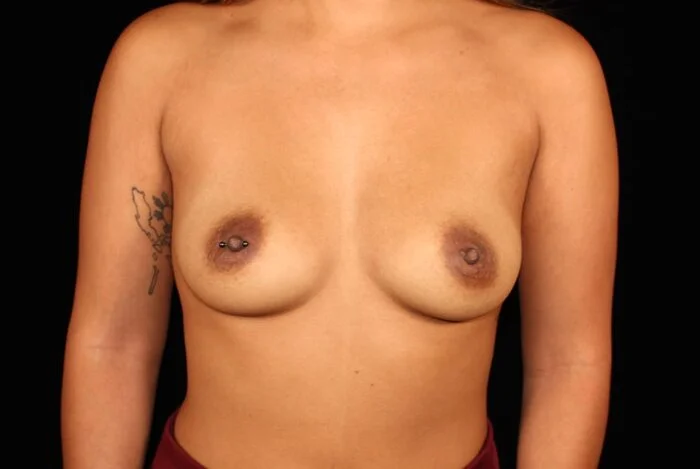
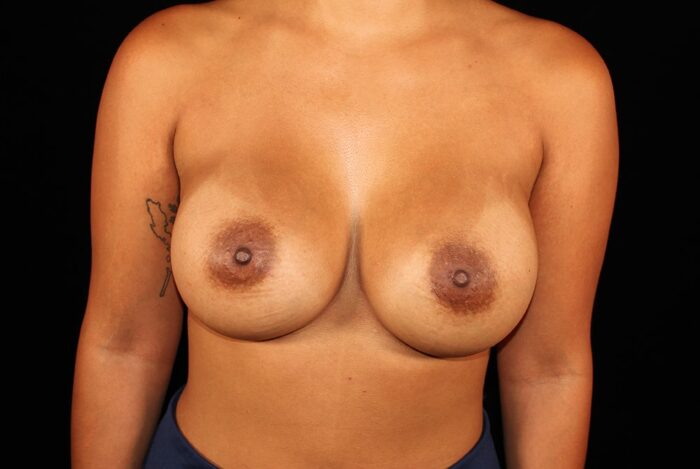
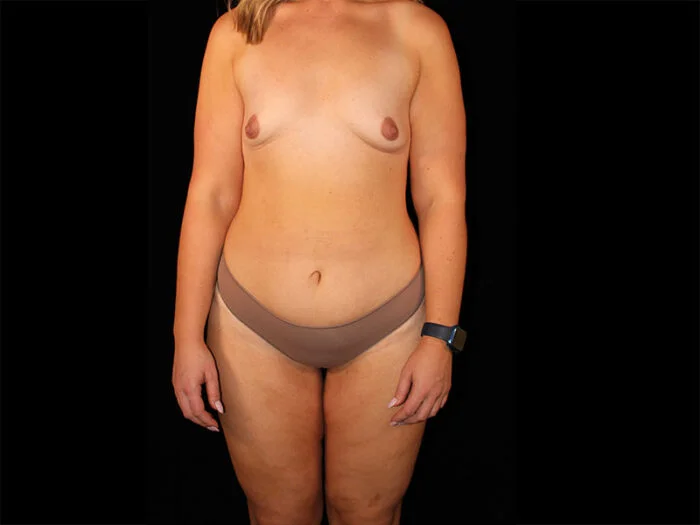
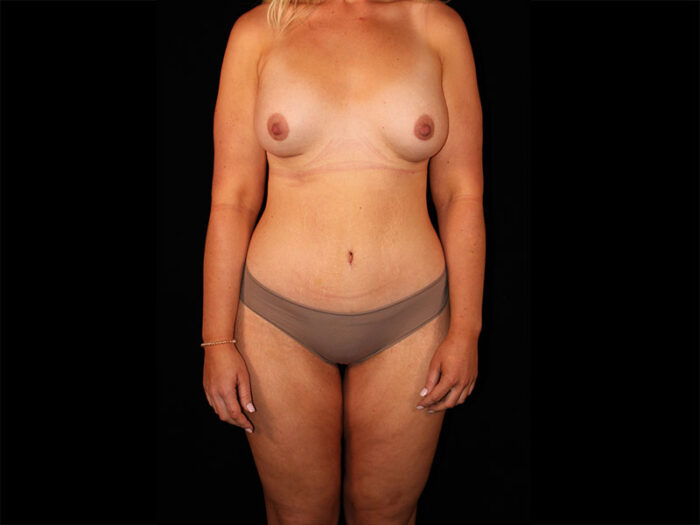
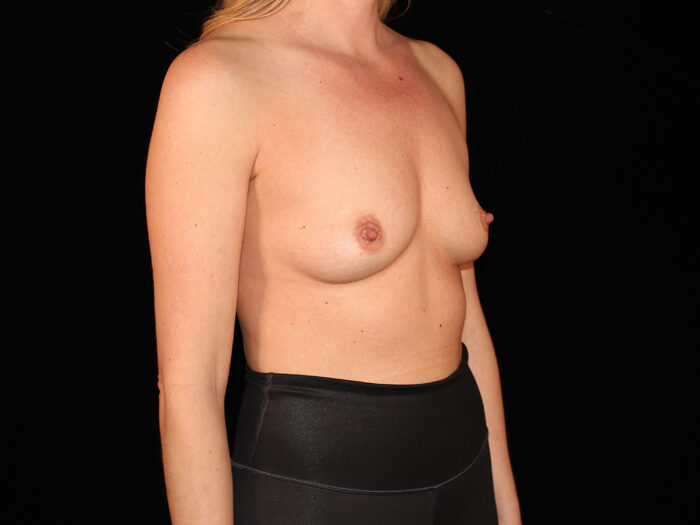
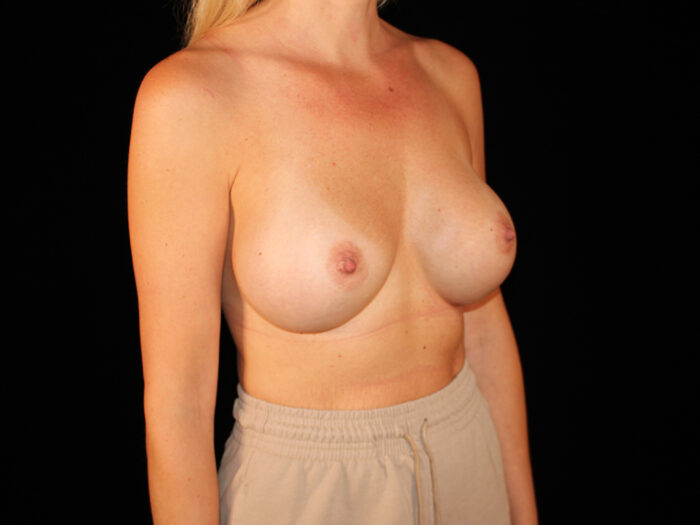
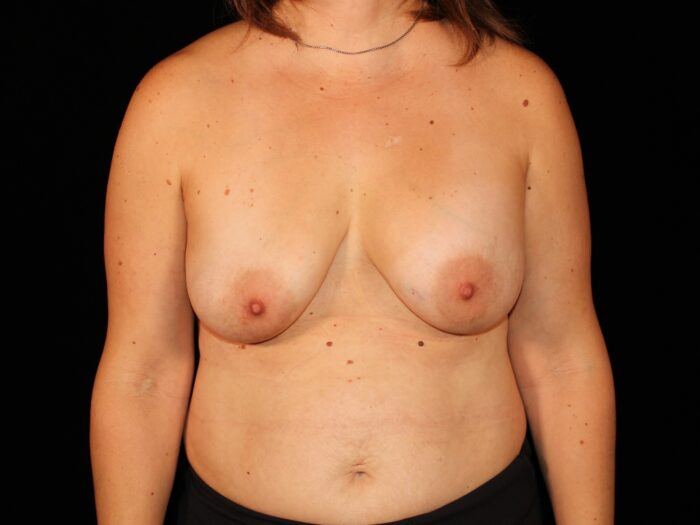
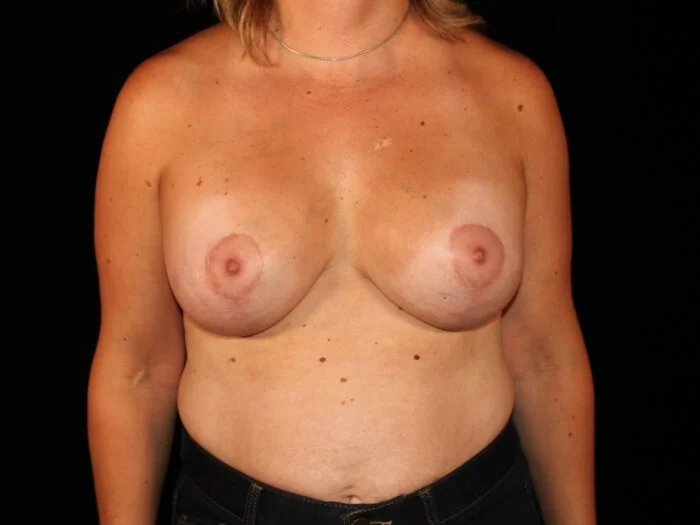
Patient 1
Before
After
View More Photos
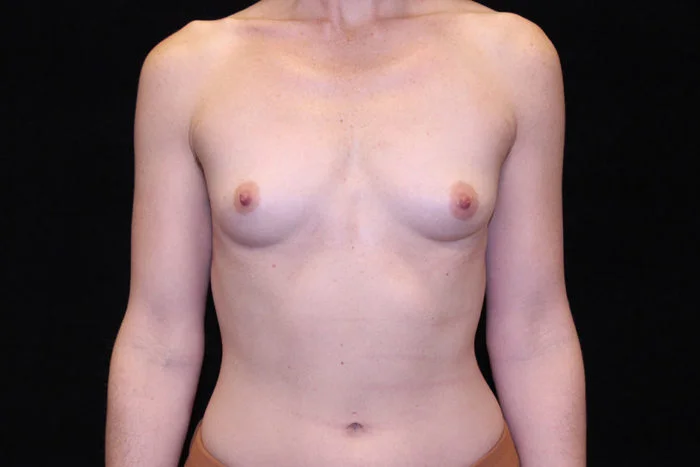
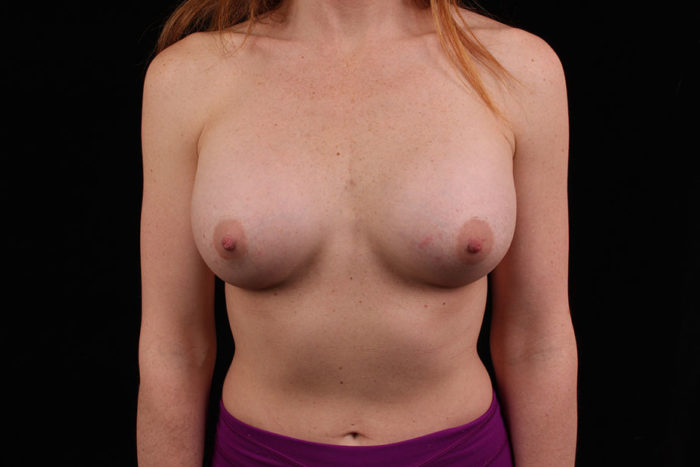
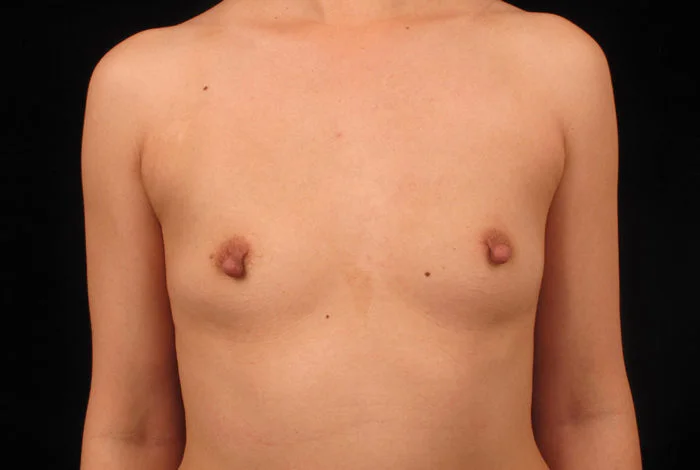
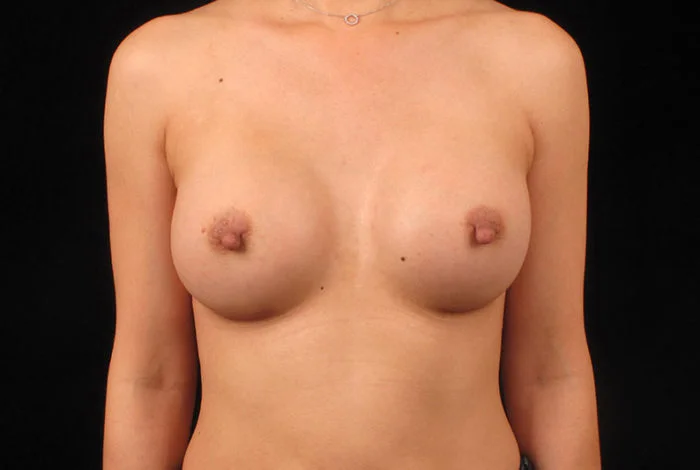
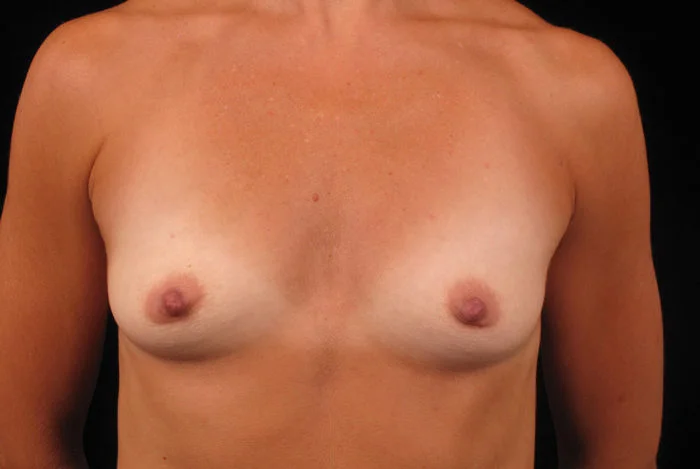
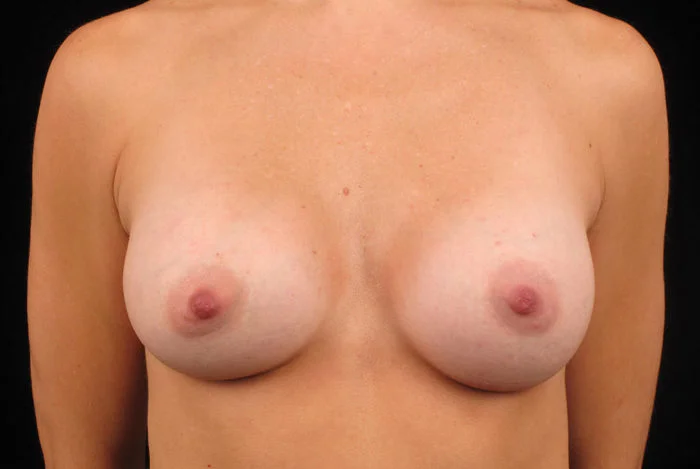
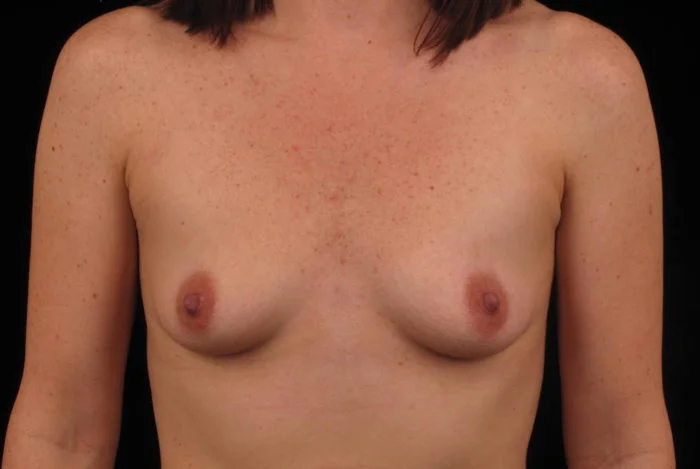
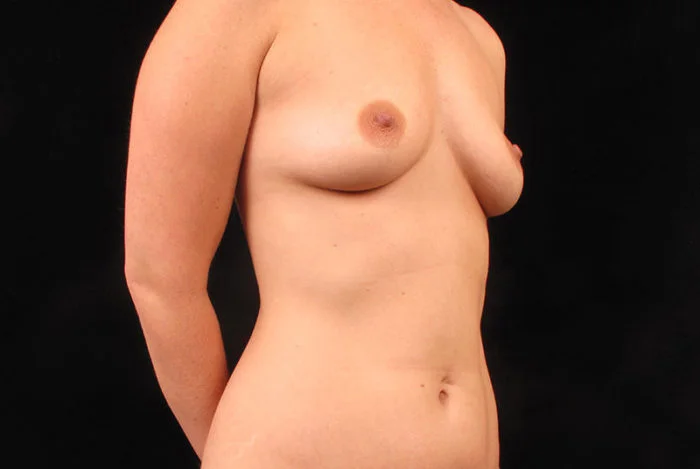
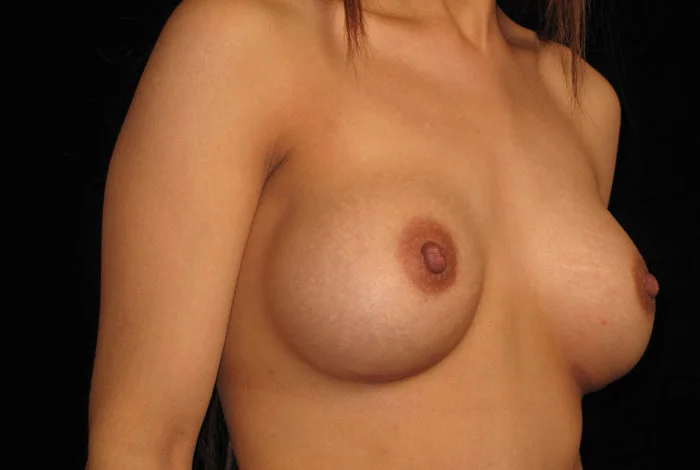
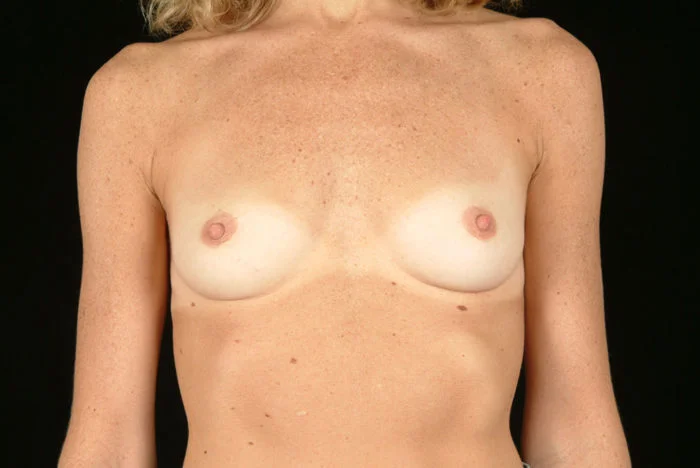
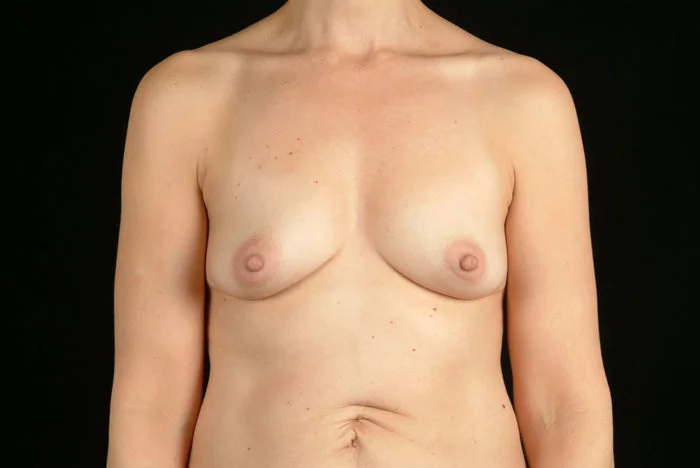
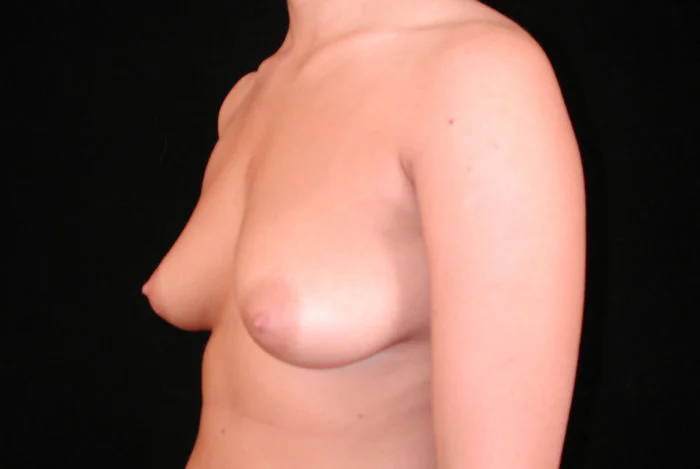
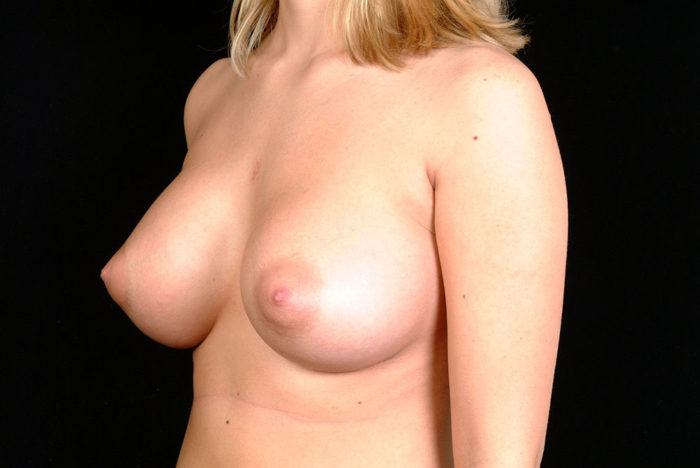
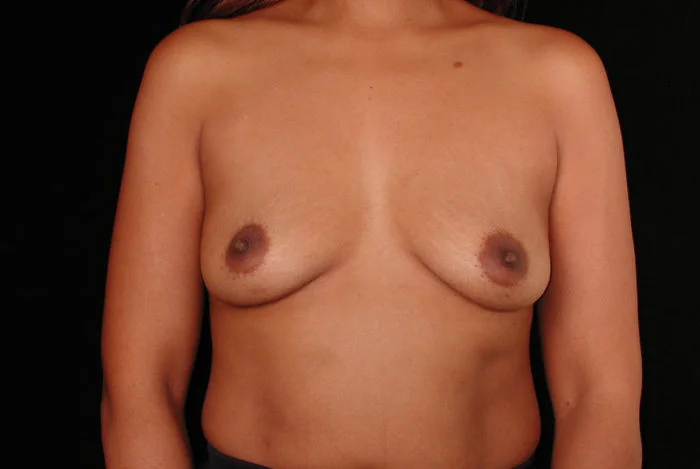
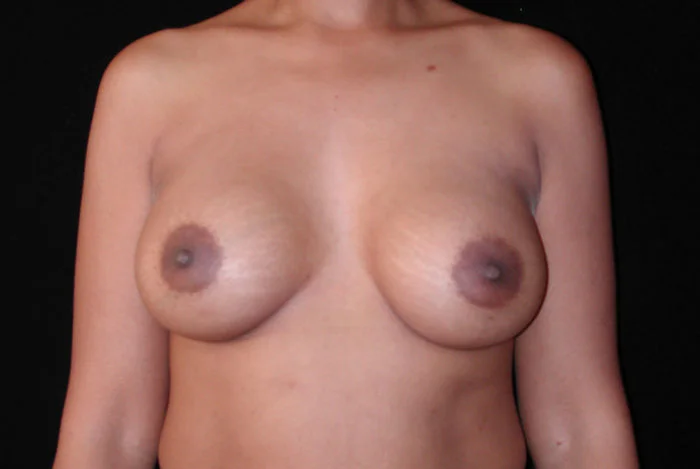
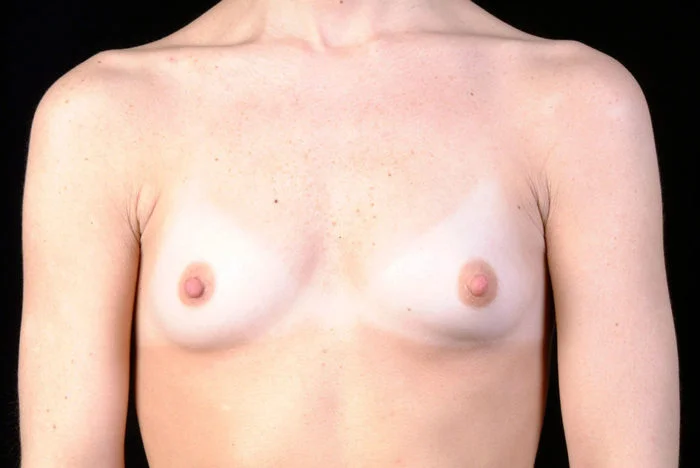
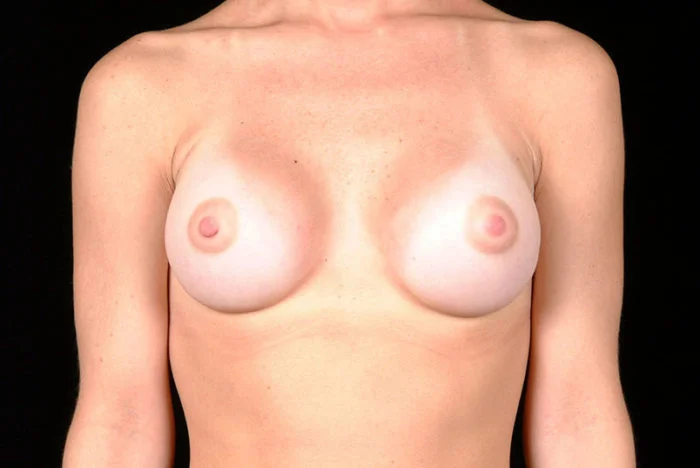
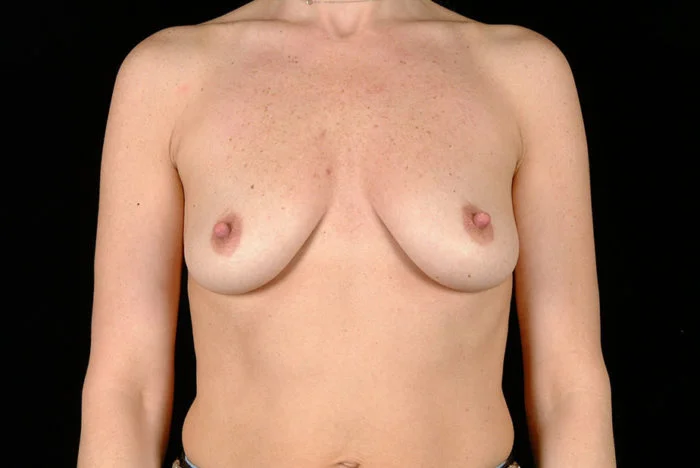
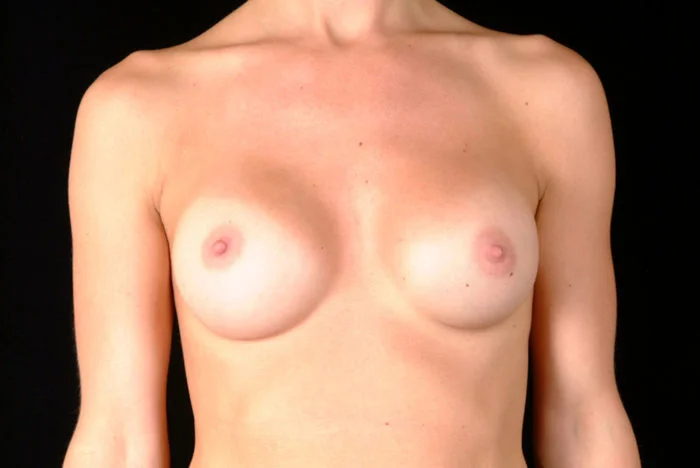
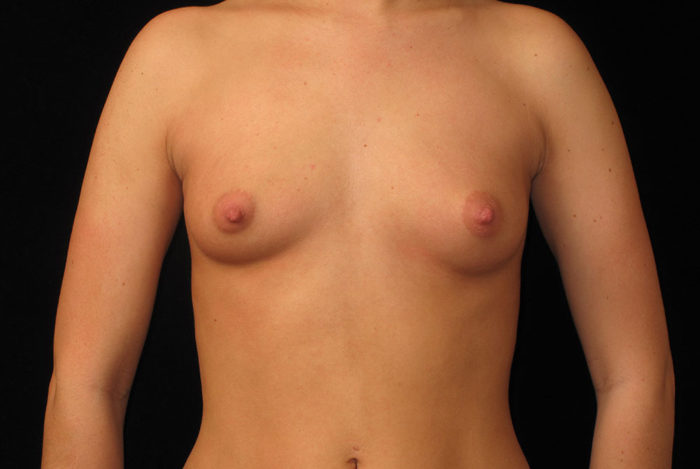
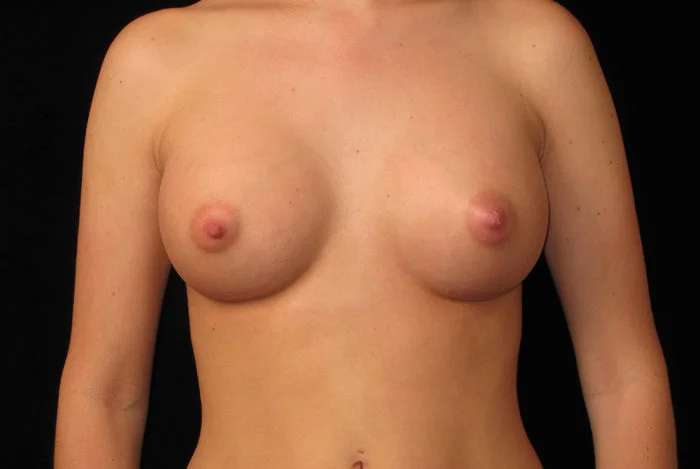
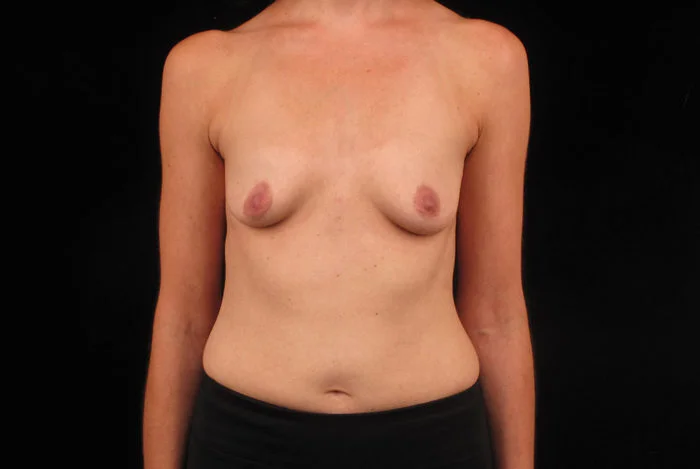
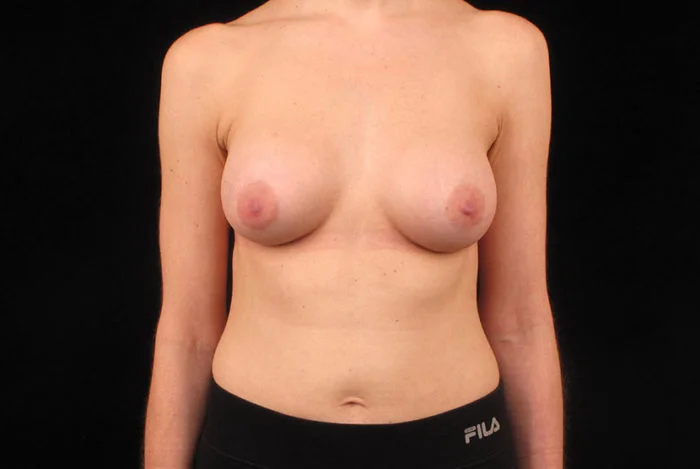
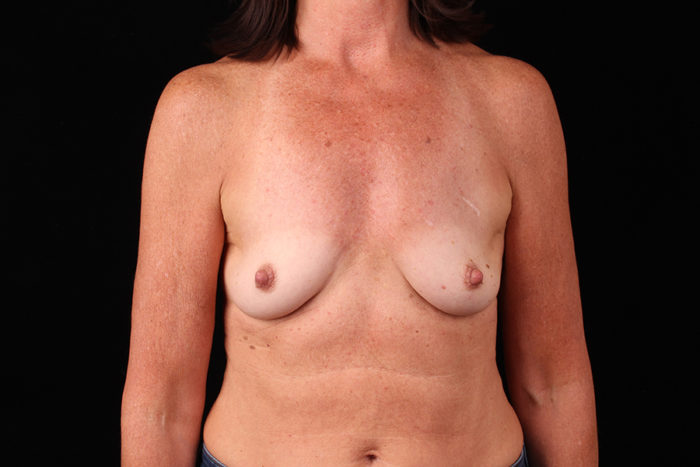
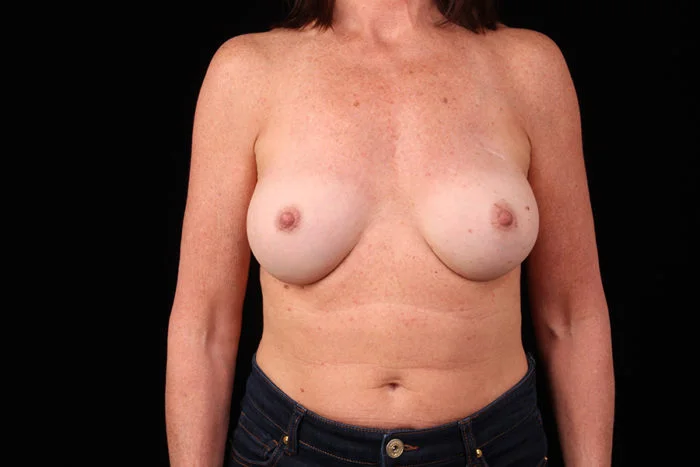
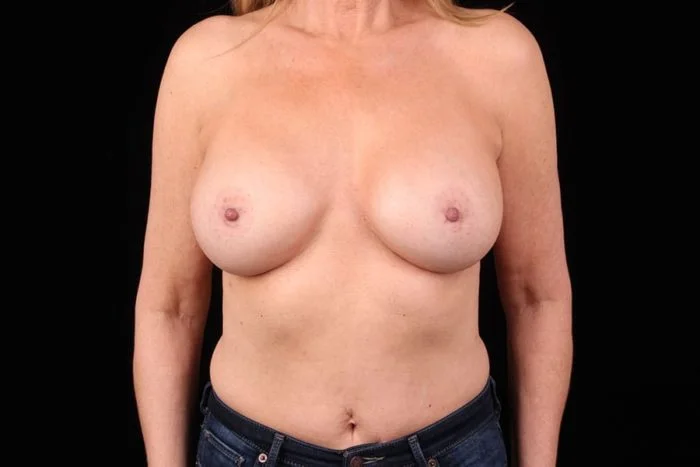
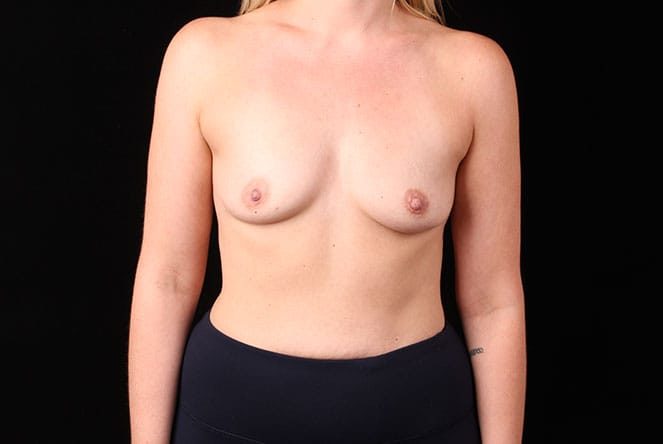
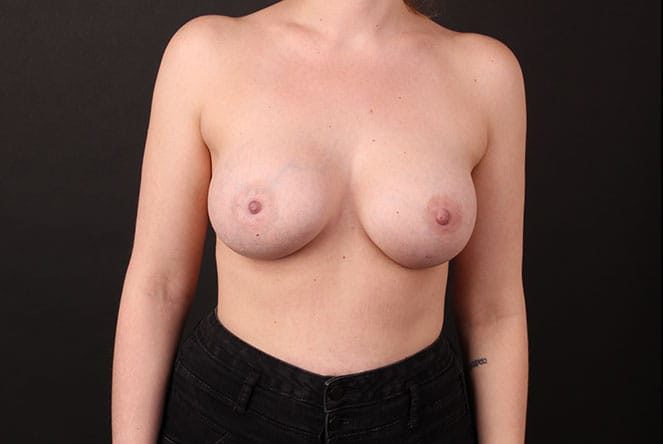
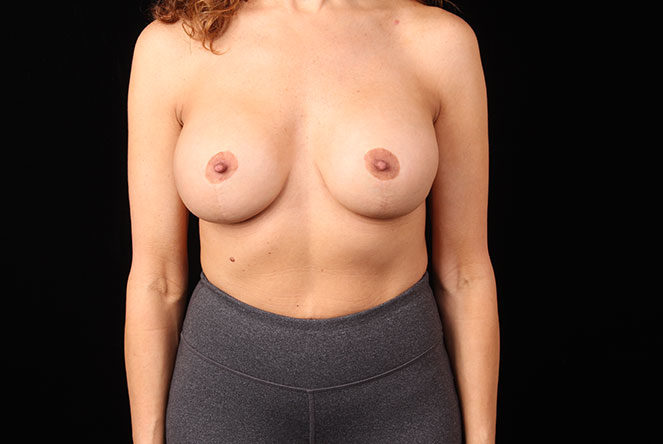
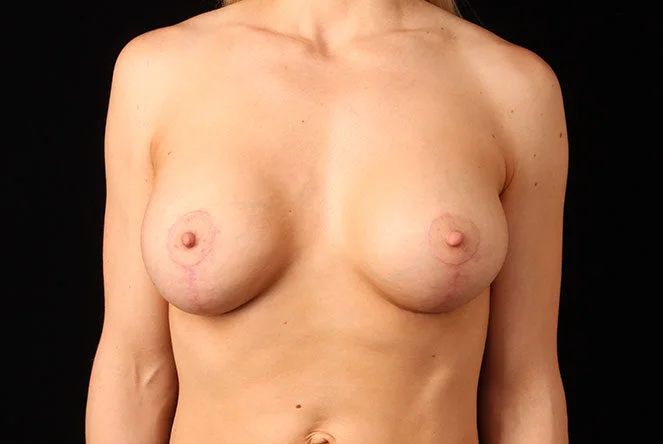
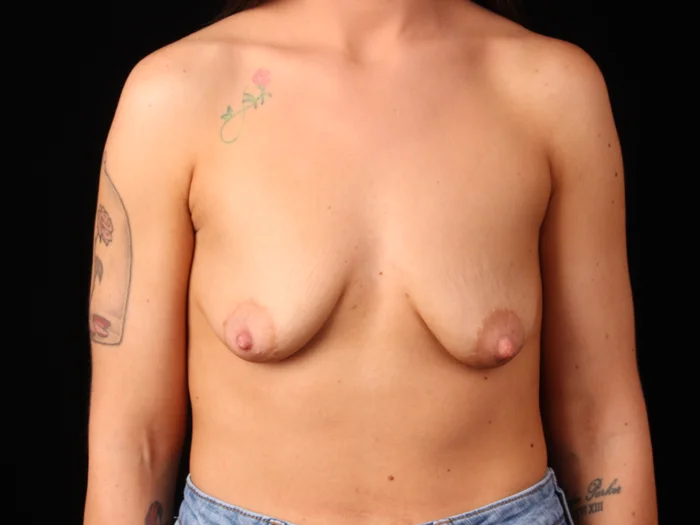
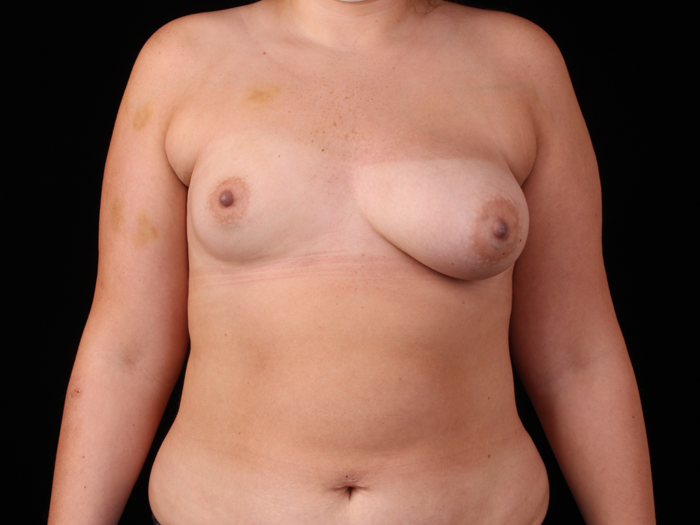
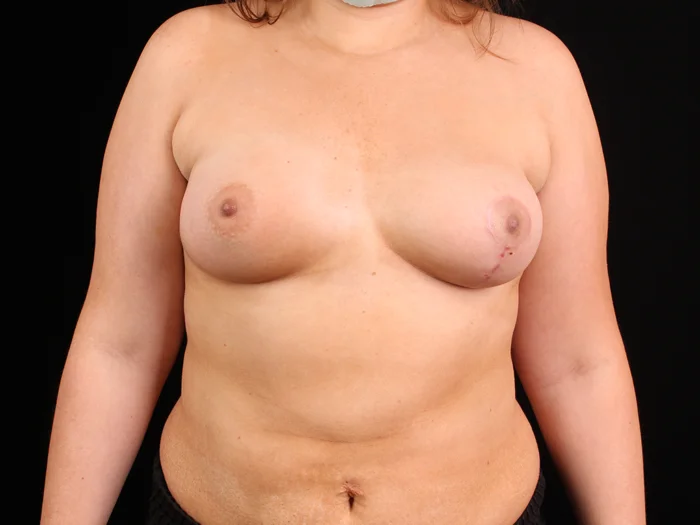
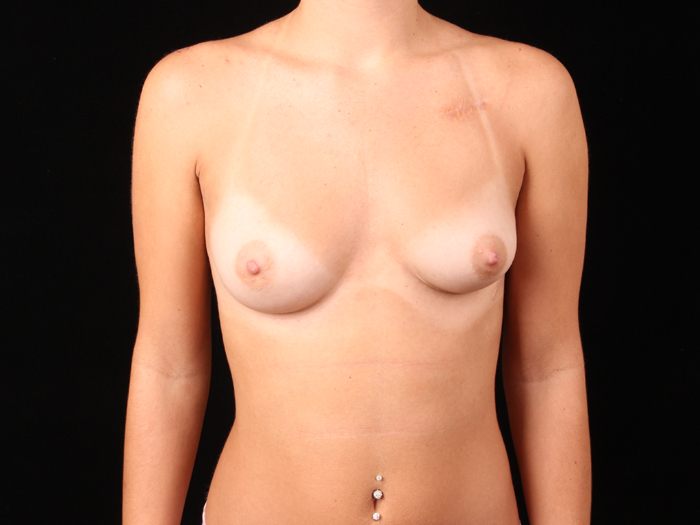
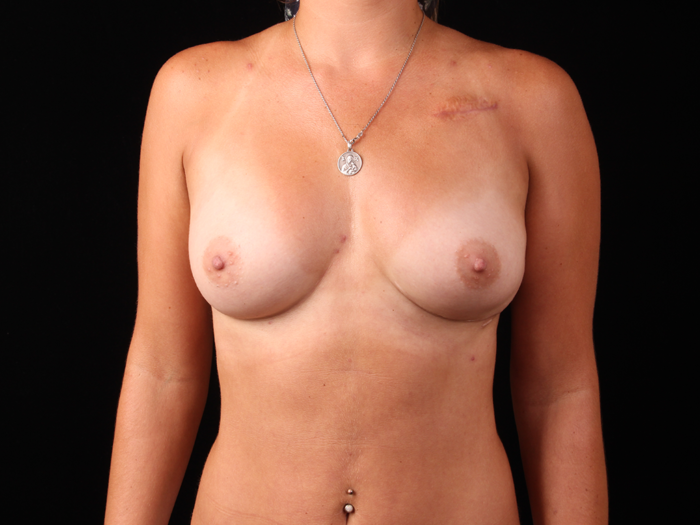
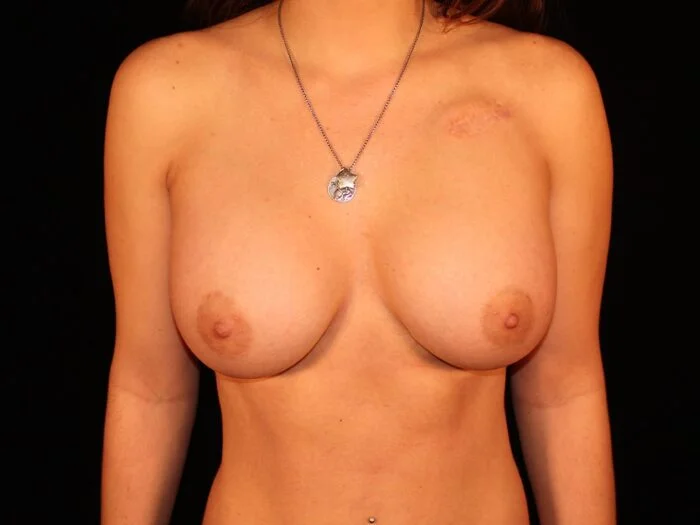
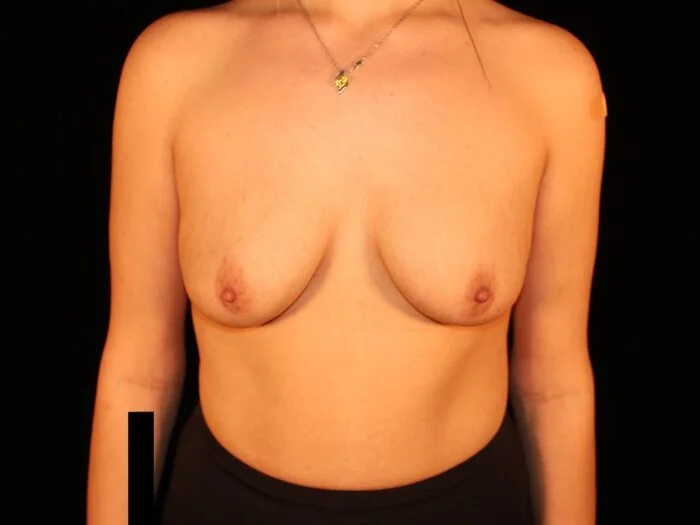
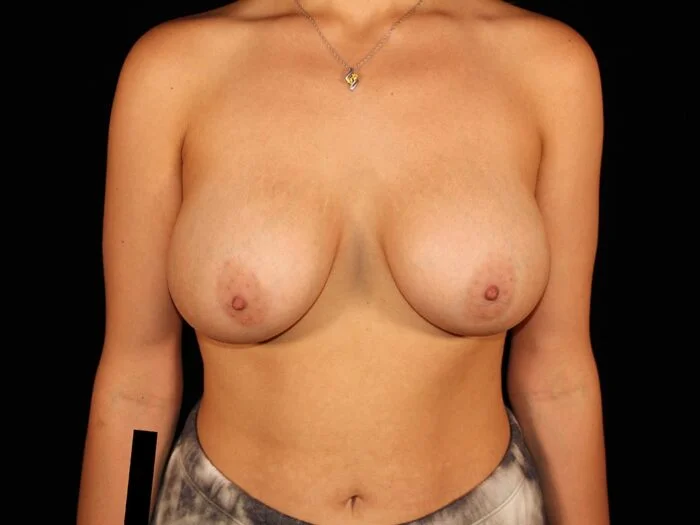
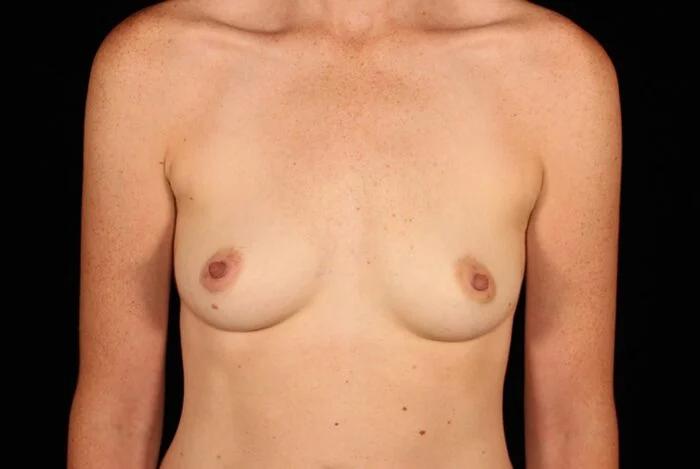
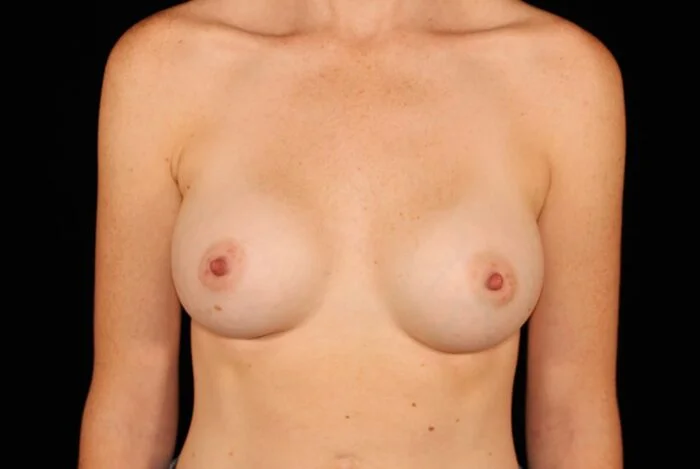
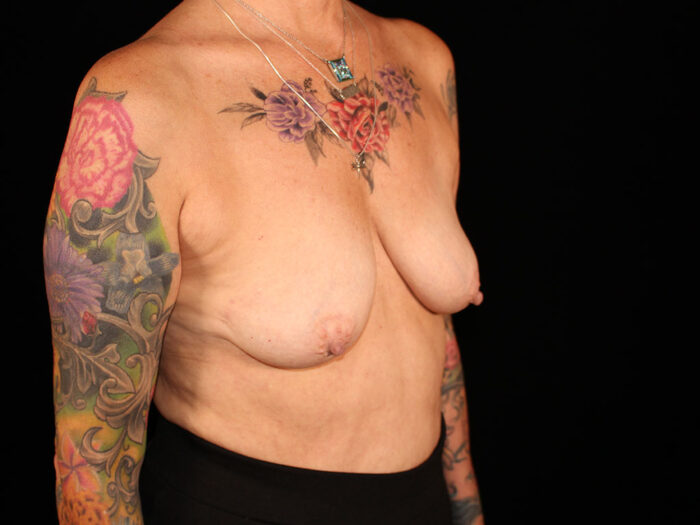
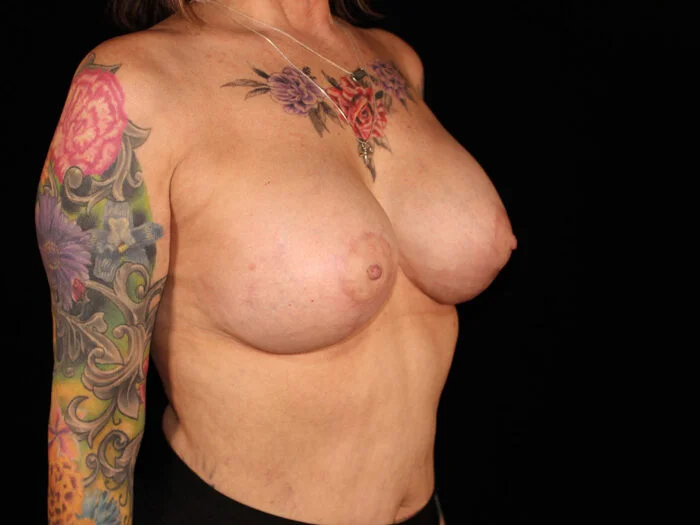
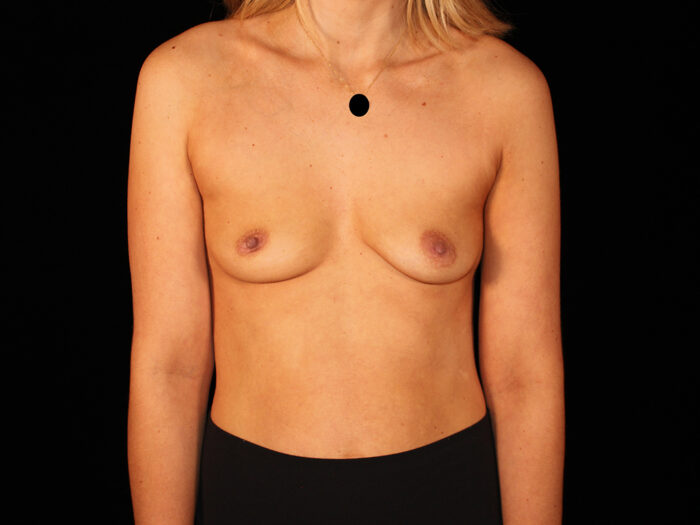
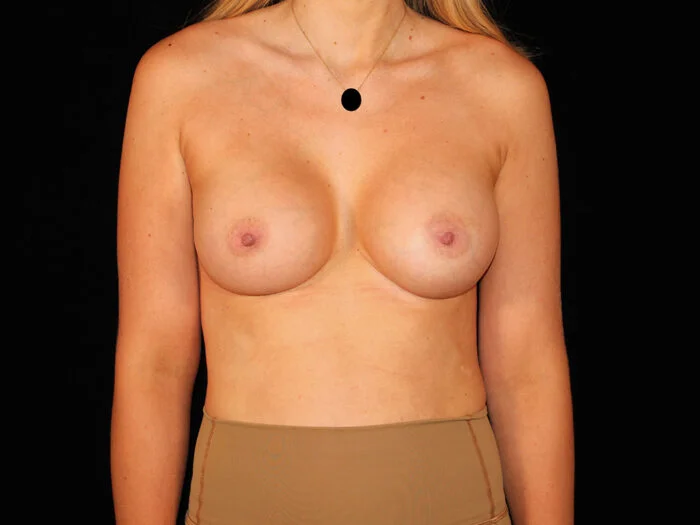
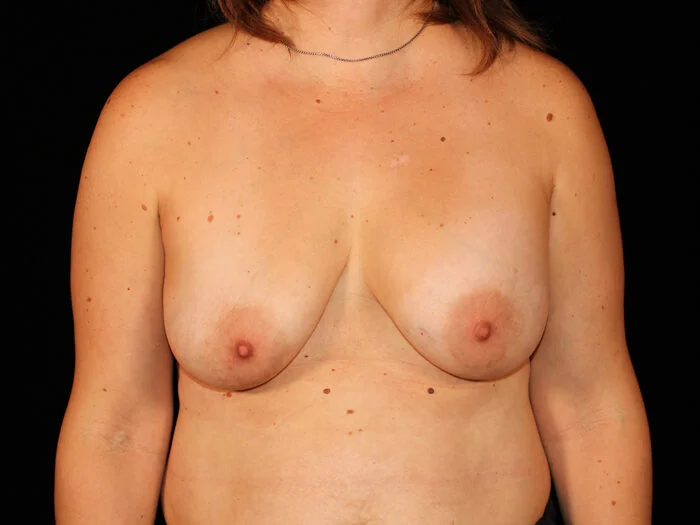
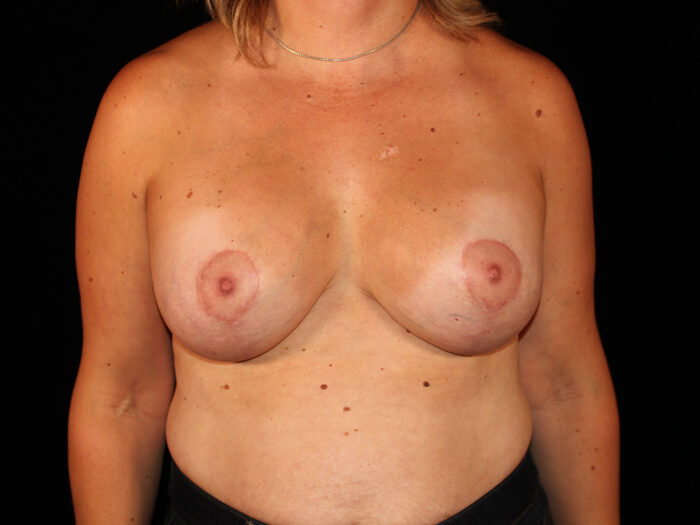
Patient 2
Before
After
View More Photos
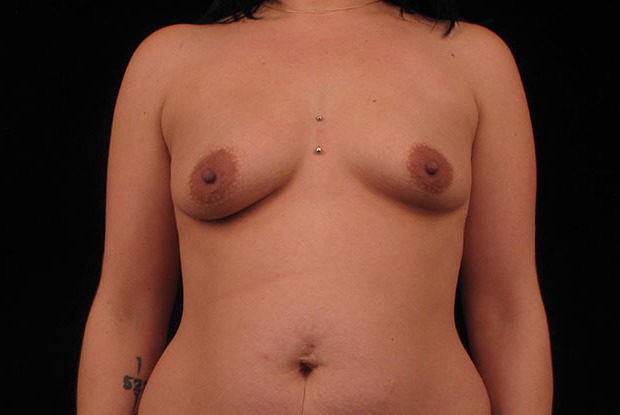
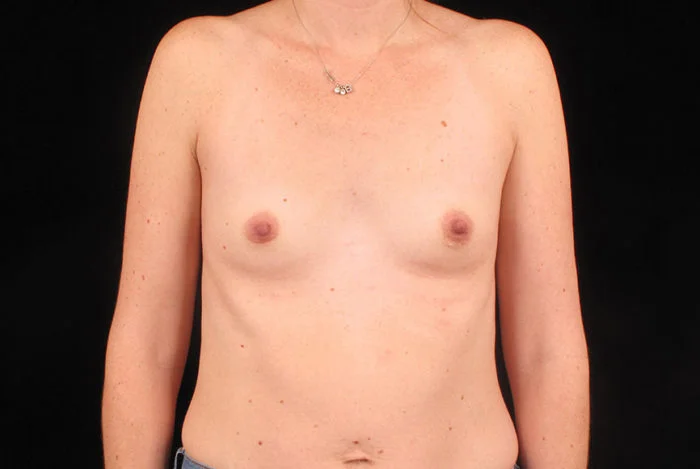
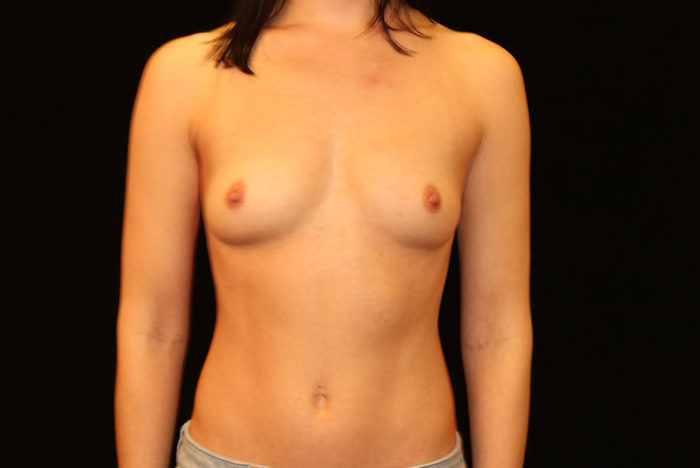
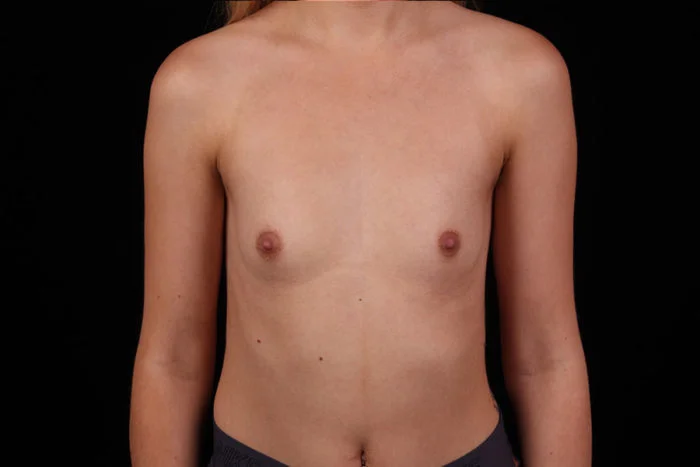
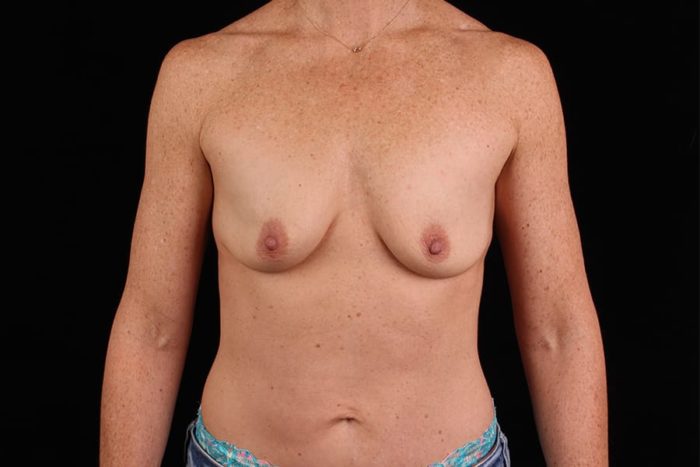
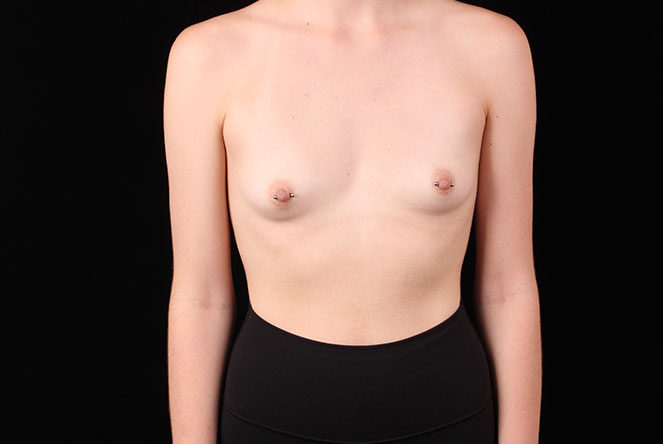
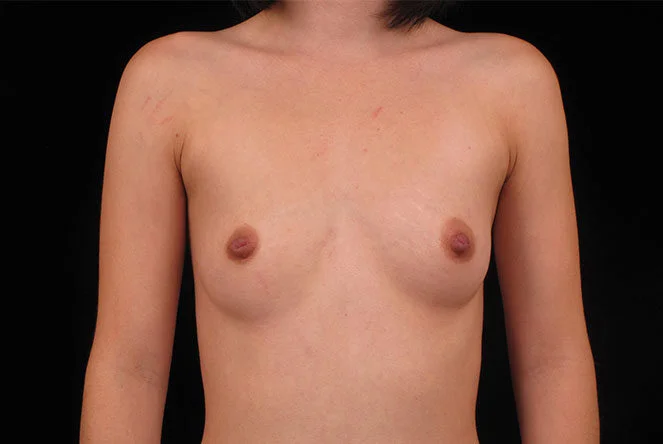
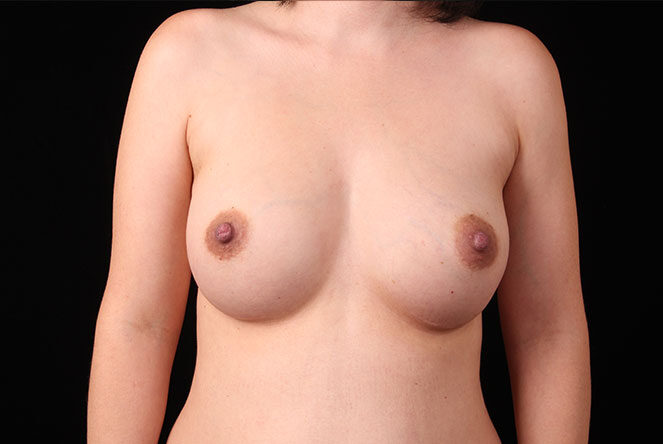
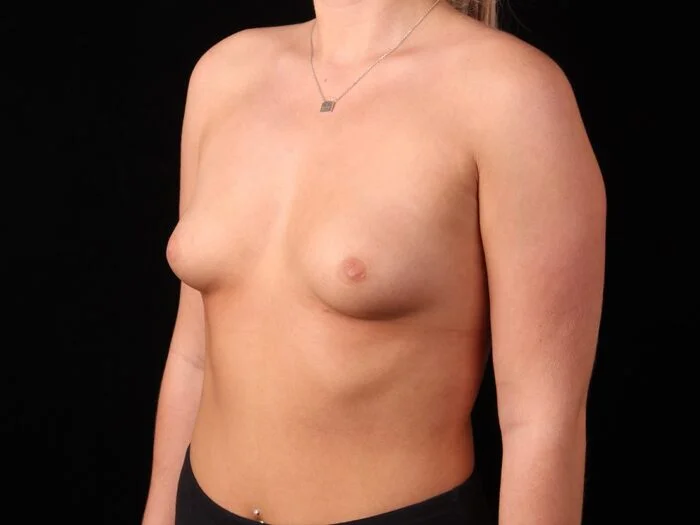
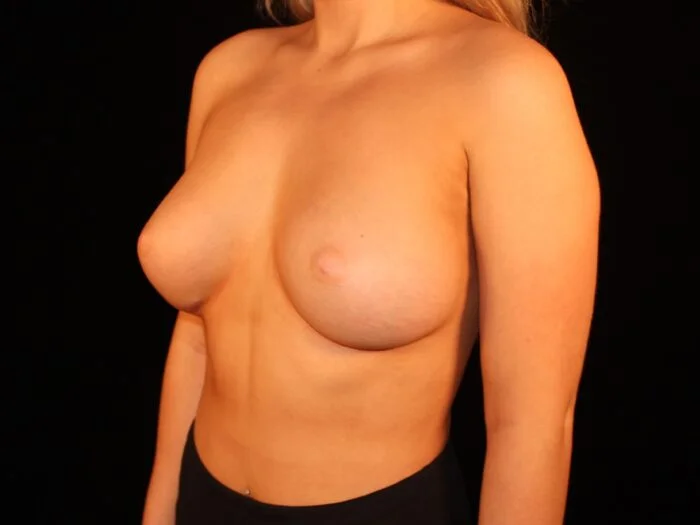
Patient 3
Before
After
View More Photos
Patient 4
Before
After
View More Photos
Patient 5
Before
After
View More Photos
Patient 6
Before
After
View More Photos
Patient 7
Before
After
View More Photos
Patient 8
Before
After
View More Photos
Patient 9
Before
After
View More Photos
Patient 10
Before
After
View More Photos
Patient 11
Before
After
View More Photos
Patient 12
Before
After
View More Photos
Patient 13
Before
After
View More Photos
Patient 14
Before
After
View More Photos
Patient 15
Before
After
View More Photos
Patient 16
Before
After
View More Photos
Patient 17
Before
After
View More Photos
Patient 18
Before
After
View More Photos
Patient 19
Before
After
View More Photos
Patient 20
Before
After
View More Photos
Patient 21
Before
After
View More Photos
Patient 22
Before
After
View More Photos
Patient 23
Before
After
View More Photos
Patient 24
Before
After
View More Photos
Patient 25
Before
After
View More Photos
Patient 26
Before
After
View More Photos
Patient 27
Before
After
View More Photos
Patient 28
Before
After
View More Photos
Patient 29
Before
After
View More Photos
Patient 30
Before
After
View More Photos
Patient 31
Before
After
View More Photos
Patient 32
Before
After
View More Photos
Patient 33
Before
After
View More Photos
Patient 34
Before
After
View More Photos
Patient 35
Before
After
View More Photos
Patient 36
Before
After
View More Photos
Patient 37
Before
After
View More Photos
Patient 38
Before
After
View More Photos
Patient 39
Before
After
View More Photos
Patient 40
Before
After
View More Photos
Patient 41
Before
After
View More Photos
Patient 42
Before
After
View More Photos
Patient 43
Before
After
View More Photos
Patient 44
Before
After
View More Photos
Patient 45
Before
After
View More Photos
Patient 46
Before
After
View More Photos
Patient 47
Before
After
View More Photos
Patient 48
Before
After
View More Photos
Patient 49
Before
After
View More Photos
Patient 50
Before
After
View More Photos
Patient 51
Before
After
View More Photos
Patient 52
Before
After
View More Photos
Patient 53
Before
After
View More Photos
Patient 54
Before
After
View More Photos
Patient 55
Before
After
View More Photos
Patient 56
Before
After
View More Photos
Patient 57
Before
After
View More Photos
Patient 58
Before
After
View More Photos
Patient 59
Before
After
View More Photos
Patient 60
Before
After
View More Photos
Patient 61
Before
After
View More Photos
Patient 62
Before
After
View More Photos
Patient 63
Before
After
View More Photos
Patient 64
Before
After
View More Photos
Patient 65
Before
After
View More Photos
English
English
Deutsch
Español
Français
Italiano
Polski
Svenska
Suomi
Português
Română
Slovenščina
Slovenčina
Nederlands
Dansk
Ελληνικά
Čeština
Magyar
Lietuvių
Latviešu
Eesti
Hrvatski
Gaeilge
Български
Norsk
Türkçe
Bahasa Indonesia
Português (Brasil)
日本語
한국어
简体中文
العربية
Русский
हिन्दी
Українська
Srpski
English (UK)
ایران
ישראל
Македонија
ประเทศไทย
Việt Nam
Accessibility Adjustments
Powered by
OneTap
Hide Toolbar
Back
How long do you want to hide the toolbar?
Hide Toolbar Duration
Only for this session
24 hours
A Week
Not Now
Hide Toolbar
Select your accessibility profile
Vision Impaired Mode
Enhances website's visuals
Seizure Safe Profile
Clear flashes & reduces color
ADHD Friendly Mode
Focused browsing, distraction-free
Blindness Mode
Reduces distractions, improves focus
Epilepsy Safe Mode
Dims colors and stops blinking
Content Modules
Font Size
+
Default
-
Readable Font
Line Height
+
Default
-
Cursor
Letter Spacing
Align Text
Font Weight
Color Modules
Light Contrast
High Contrast
Monochrome
Orientation Modules
Reading Line
Reading Mask
Hide Images
Highlight Content
Stop Animations
Highlight Links
Skip To Content
Choose...
Main Content
Navigation
Footer
Reset Settings